PySide6开发桌面程序,PySide6入门实战
|
admin 2025年2月13日 22:13
本文热度 2511
2025年2月13日 22:13
本文热度 2511
|
文章目录系列文章索引
一、前期准备 1、简介及安装 2、PyCharm PySide6环境搭建
二、QT常用控件 三、布局 1、概述 2、弹簧控件QSpacerltem 3、布局里常用的函数 4、栅格布局 5、表单布局 6、分裂器布局 7、绝对布局
四、信号槽与事件机制 1、普通槽函数使用 2、鼠标事件 3、键盘事件 4、组合按键事件 5、事件过滤
五、QMainWindow使用介绍 1、简介 2、菜单栏 3、工具栏 4、状态栏 5、QDockWidget
六、样式表qss 1、概述 2、通用组件常用样式 3、QLineEdit组件常用样式 4、QpushButton常用样式 5、QSlider常用样式 6、QComboBox常用样式 7、QProgressBar常用样式 8、QMenu菜单样式 9、qss选择器 10、使用qss文件动态加载qss 11、QDarkStyle夜间模式 12、禁止子窗口使用主窗口的样式
七、图表与曲线 八、使用SQLite数据库 1、简介及准备工作 2、基本语法 3、PySide6使用SQLite
九、项目打包 1、常用打包技术 2、PySide6项目打包 (1)使用pyinstaller打包python (2)使用Inno Setup (3)图标注意事项
附
一、前期准备1、简介及安装(1)为什么用PySide而不是PyQt
PyQt是由 Riverbank Computing 公司开发,出现的比较早;它采用GPLV3许可证和商业许可证;这表示你如果使用PyOt,则必须将你的代码进行开源;如果要闭源,则需要购买商业许可。
https://riverbankcomputing.com/software/pyqt/intro
PySide是 Ot 官方开源的Python Qt库,出现的时间要比PyOt晚的多,这也是很多人知道PyOt不知道PySide的原因;但随着版本的选代,PvSide越来越强大,目前最新的是PvSide6,建议直接学PvSide6。
https://doc.qt.io/qtforpython-6/
(2)QT开发常见技术栈
C++ QWidget;
C++ QML;
Qt5、Qt6;
PyQt5、PyQt6;
PySide2、PySide6;
Python QML。
(3)安装pyside6 pip install pyside6 -i https://mirror.baidu.com/pypi/simple
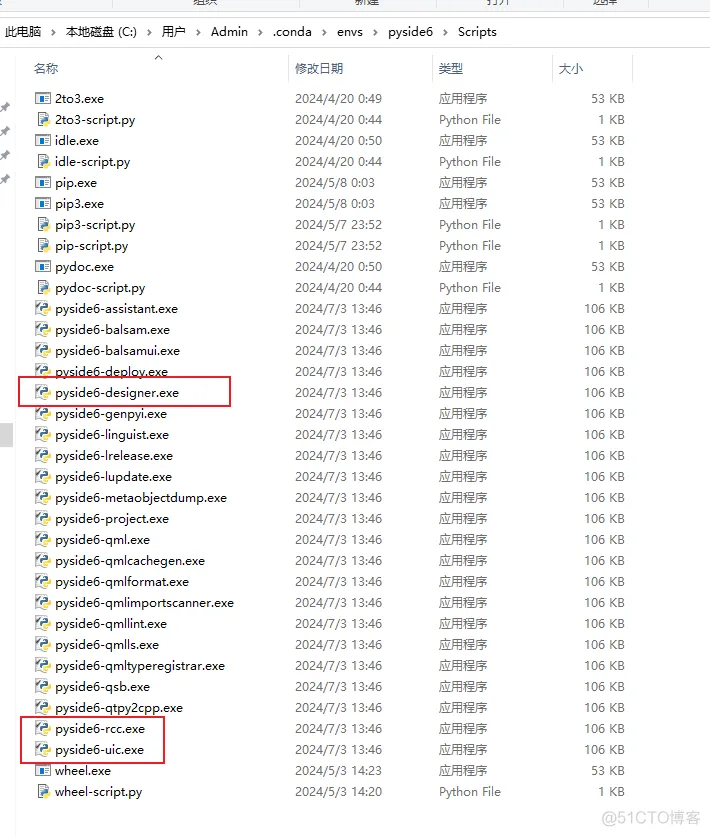
2、PyCharm PySide6环境搭建(1)基础环境win10/win11 64位,安装python环境(可以用Anaconda),安装PyCharm。 (2)配置QT Designer、PyUIC、PyRCC1、安装好PySide6之后,会下载这些:
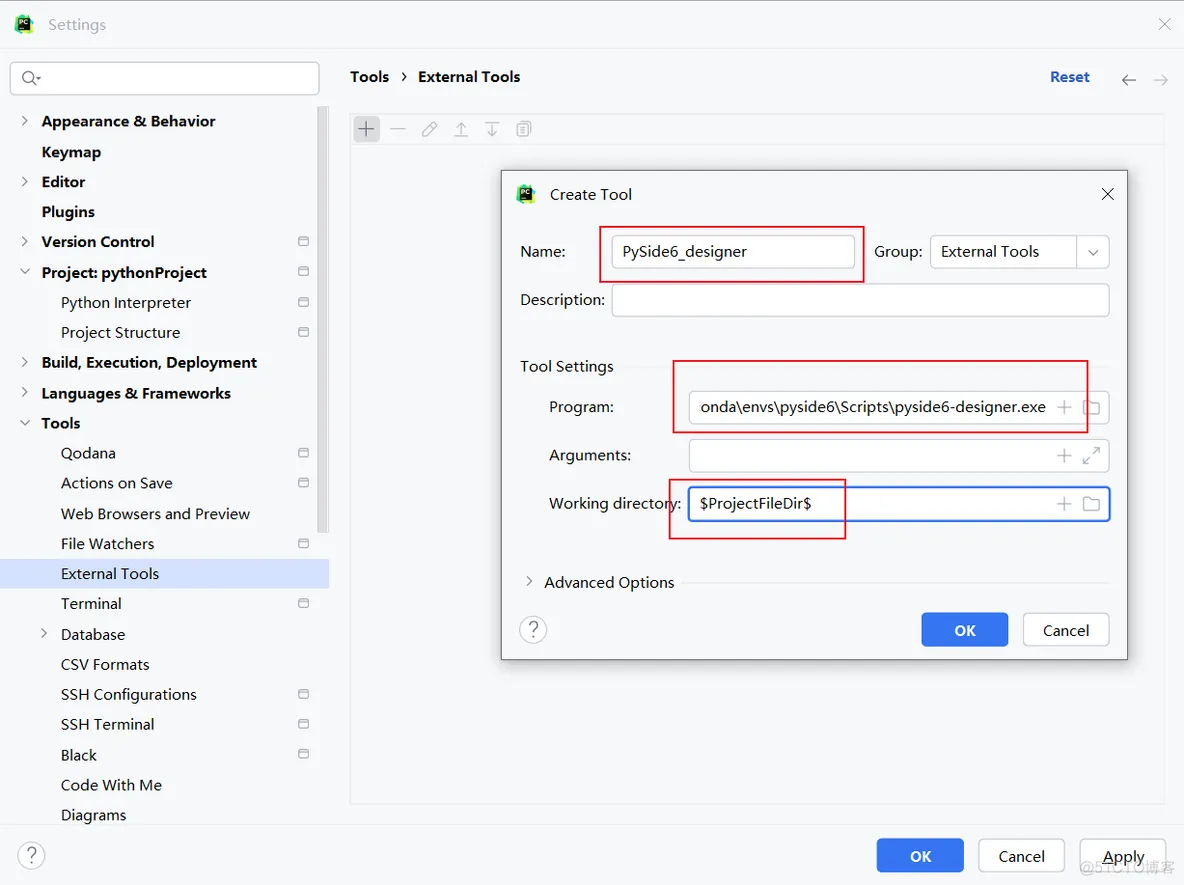
2、配置PySide6_designer:(Qt设计器,可以往窗口上拖控件,设置布局,快速构建窗口,文件后缀.ui)
Program:C:\Users\Admin\.conda\envs\pyside6\Scripts\pyside6-designer.exe Arguments不需要 填。
Working directory:$ProjectFileDir$
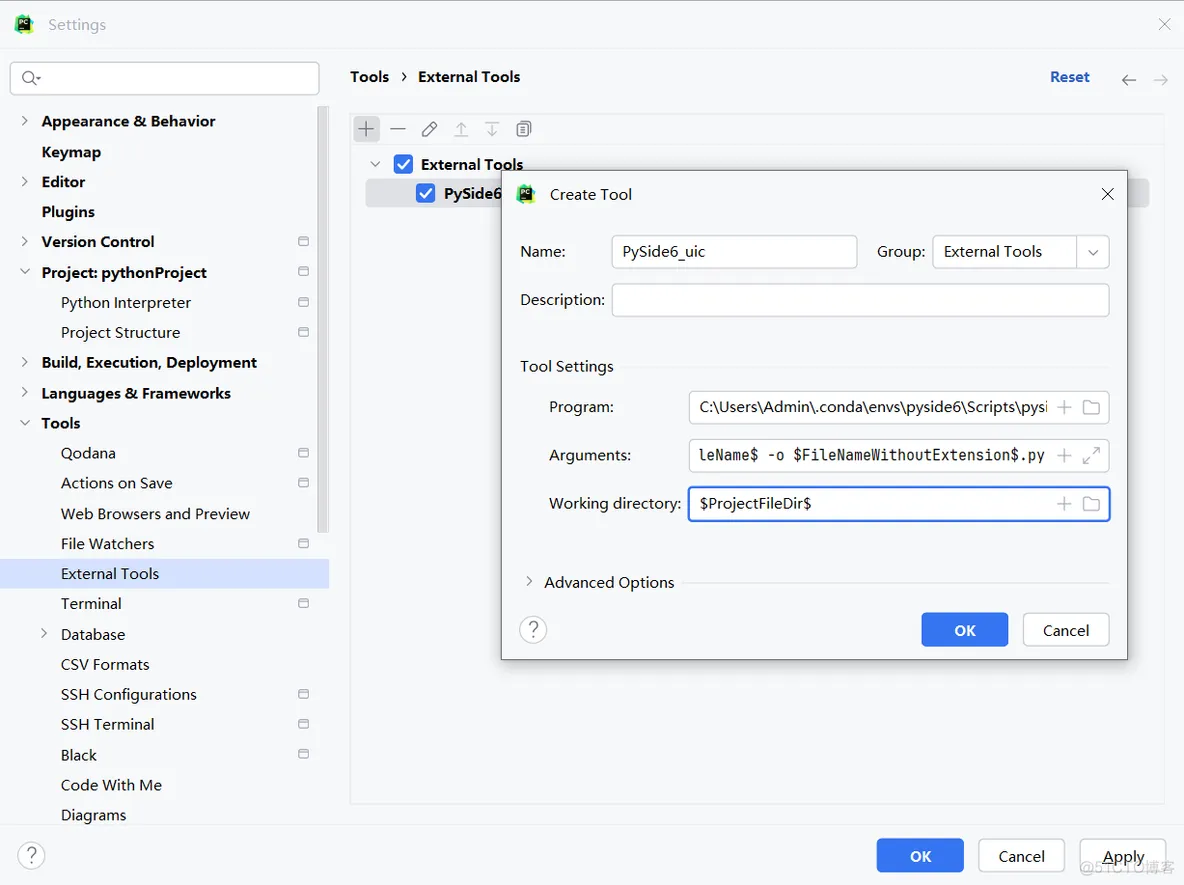
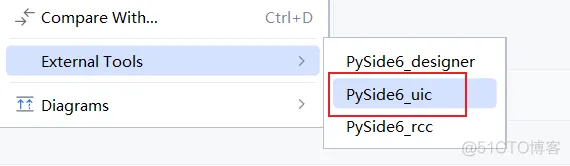
3、配置PySide6_uic(将.ui文件编译为python代码)
Program:C:\Users\Admin\.conda\envs\pyside6\Scripts\pyside6-uic.exe
Arguments:$FileName$ -o $FileNameWithoutExtension$.py
Working directory:$ProjectFileDir$
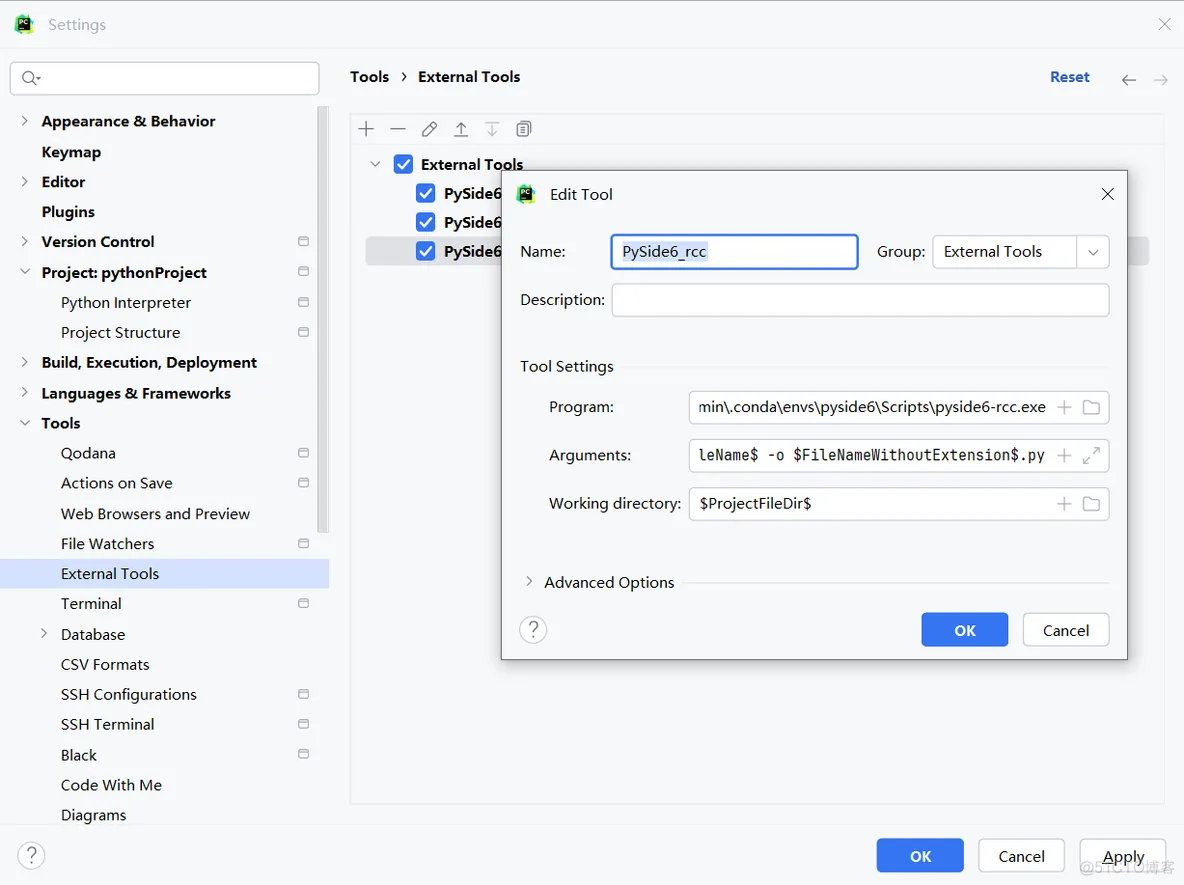
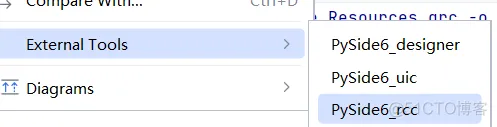
4、配置PySide6_rcc(将资源文件.qrc编译为python代码)
Program:C:\Users\Admin\.conda\envs\pyside6\Scripts\pyside6-rcc.exe Arguments:$FileName$ -o $FileNameWithoutExtension$.py
Working directory:$ProjectFileDir$
5、此时,右键项目,就会有这几个工具了:

运行之后,返回码是0就说明成功。
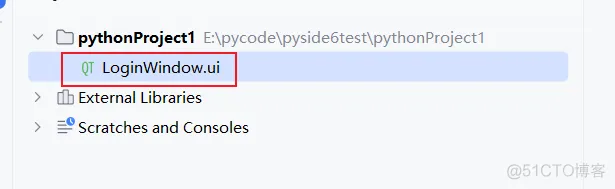
(3)使用pyside6项目1、右键项目,选择我们安装的Designer,就可以拖动组件,创建一个ui布局了,保存之后,会保存在项目根路径。
这是一个xml文件,双击可以再次打开。

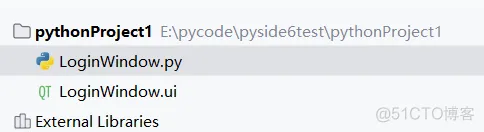
2、右键ui文件,生成python代码
3、编写MainWindowImpl.py继承主窗口 import LoginWindow
# 定义一个子类,自定义逻辑可以写在子类
class MainWindowImpl(LoginWindow.Ui_MainWindow):
def __init__(self, window):
super().__init__()
self.setupUi(window)
# 可以写自定义逻辑
#self.lineEdit.setText("user")
4、编写主类 import sys
from PySide6.QtWidgets import QApplication, QMainWindow
import MainWindowImpl
if __name__ == '__main__':
app = QApplication(sys.argv)
mw = QMainWindow()
impl = MainWindowImpl.MainWindowImpl(mw)
mw.show()
sys.exit(app.exec()) # 进入QT事件循环
# 也可以不用子类,直接这样写,但是自定义逻辑不太好写,每次修改ui会覆盖代码
# if __name__ == '__main__':
# app = QApplication(sys.argv)
#
# mw = QMainWindow()
# mwReal = MainWindow.Ui_MainWindow()
# mwReal.setupUi(mw)
# mw.show()
#
# sys.exit(app.exec()) # 进入QT事件循环
1. 2. 3. 4. 5. 6. 7. 8. 9. 10. 11. 12. 13. 14. 15. 16. 17. 18. 19. 20. 21. 22. 23.
(4)资源文件编写与编译1、右键,new file :Resources.qrc 同时添加上资源文件。 <!DOCTYPE RCC>
<RCC version="1.0">
<qresource>
<file alias="logo">./Resources/test.jpg</file>
</qresource>
</RCC>
2、qrc文件右键,进行rcc编译
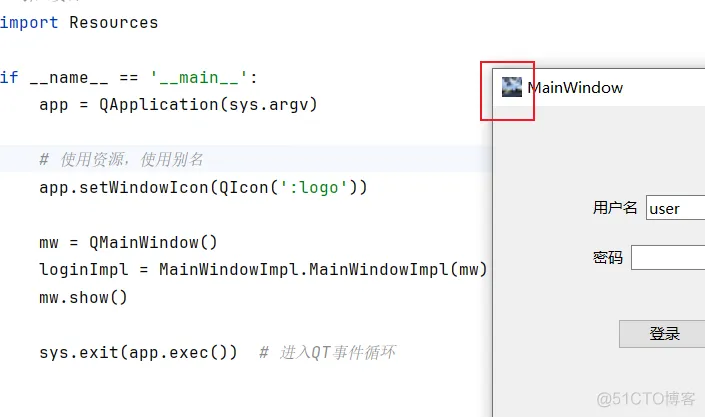
3、使用图片资源
import sys
from PySide6.QtGui import QIcon
from PySide6.QtWidgets import QApplication, QMainWindow
import MainWindowImpl
# 引入资源!!一定要做的
import Resources
if __name__ == '__main__':
    app = QApplication(sys.argv)
    # 使用资源,使用别名
    app.setWindowIcon(QIcon(':logo'))
    mw = QMainWindow()
    impl = MainWindowImpl.MainWindowImpl(mw)
    mw.show()
    sys.exit(app.exec())  # 进入QT事件循环
1. 2. 3. 4. 5. 6. 7. 8. 9. 10. 11. 12. 13. 14. 15. 16. 17. 18.
二、QT常用控件1、Qt窗口类Qt包含三个窗口类:QMainWindow、QWidget、QDialog
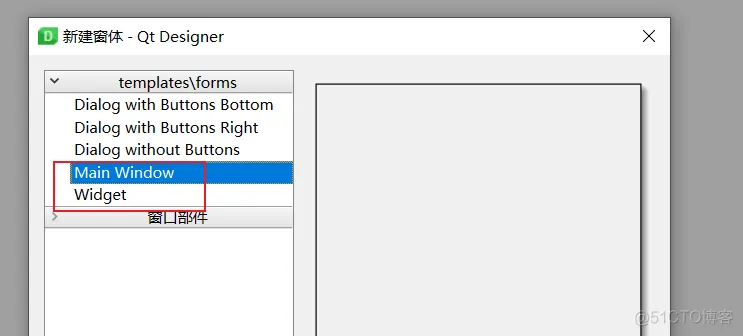
其中,MainWindow,是包含标题栏、菜单栏更加丰富的窗口。
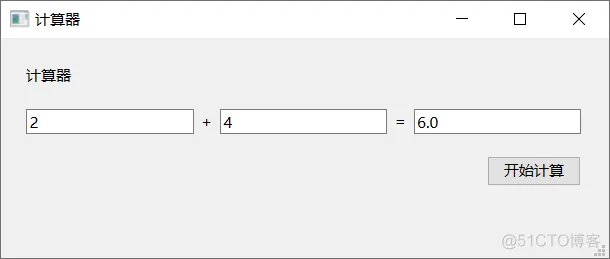
2、QLineEdit、QLabel、QPushButton(1)ui布局
另存为CalcMainWindow.ui,并使用uic生成python文件。

(2)编写子类
可以给按钮添加点击事件。
添加子类的目的是,防止每次编辑了ui,自己的代码被覆盖了。
from PySide6.QtWidgets import QMessageBox
import CalcMainWindow
class CalcMainWindowImpl(CalcMainWindow.Ui_MainWindow):
    def __init__(self, window):
        super().__init__()
        self.setupUi(window)
        # pushButton的点击事件,这是那个按钮的objectName
        self.pushButton.clicked.connect(self.onCalc)
    # 槽函数
    def onCalc(self):
        # 获取第一个和第二个输入框的内容,获取的时候是字符串,需要转换
        str1 = self.lineEdit1.text().strip()
        str2 = self.lineEdit2.text().strip()
        if len(str1) == 0 or len(str2) == 0:
            QMessageBox.warning(None, 'Warning', '请输入两个加数')
            return
        num1 = float(str1)
        num2 = float(str2)
        result = num1 + num2
        self.lineEdit3.setText(str(result))
1. 2. 3. 4. 5. 6. 7. 8. 9. 10. 11. 12. 13. 14. 15. 16. 17. 18. 19. 20. 21. 22. 23. 24. 25. 26. 27.
(3)主类 import sys
from PySide6.QtWidgets import QApplication, QMainWindow
import CalcMainWindowImpl
if __name__ == '__main__':
app = QApplication(sys.argv)
mw = QMainWindow()
impl = CalcMainWindowImpl.CalcMainWindowImpl(mw)
mw.show()
sys.exit(app.exec()) # 进入QT事件循环
1. 2. 3. 4. 5. 6. 7. 8. 9. 10. 11. 12. 13.
(4)运行结果
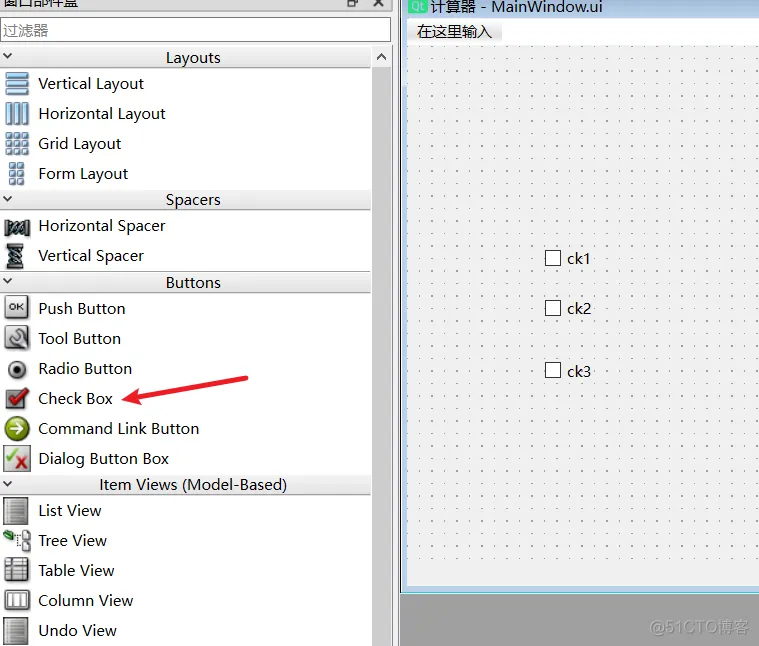
3、QCheckBox(复选框)及其信号槽(1)ui
ui保存命名为MainWindow
(2)编写子类
import MainWindow
class MainWindowImpl(MainWindow.Ui_MainWindow):
    def __init__(self, window):
        super().__init__()
        self.setupUi(window)
        # checkBox状态改变事件的监听
        self.checkBox1.stateChanged.connect(self.onCheckBox1StateChanged)
    def onCheckBox1StateChanged(self, state):
        # 没选中是0,选中后是2
        if state == 0:
            print("Checked")
        if state == 2:
            print("Un Checked")
1. 2. 3. 4. 5. 6. 7. 8. 9. 10. 11. 12. 13. 14. 15. 16. 17. 18. 19.
4、QComboBox下拉框(1)ui
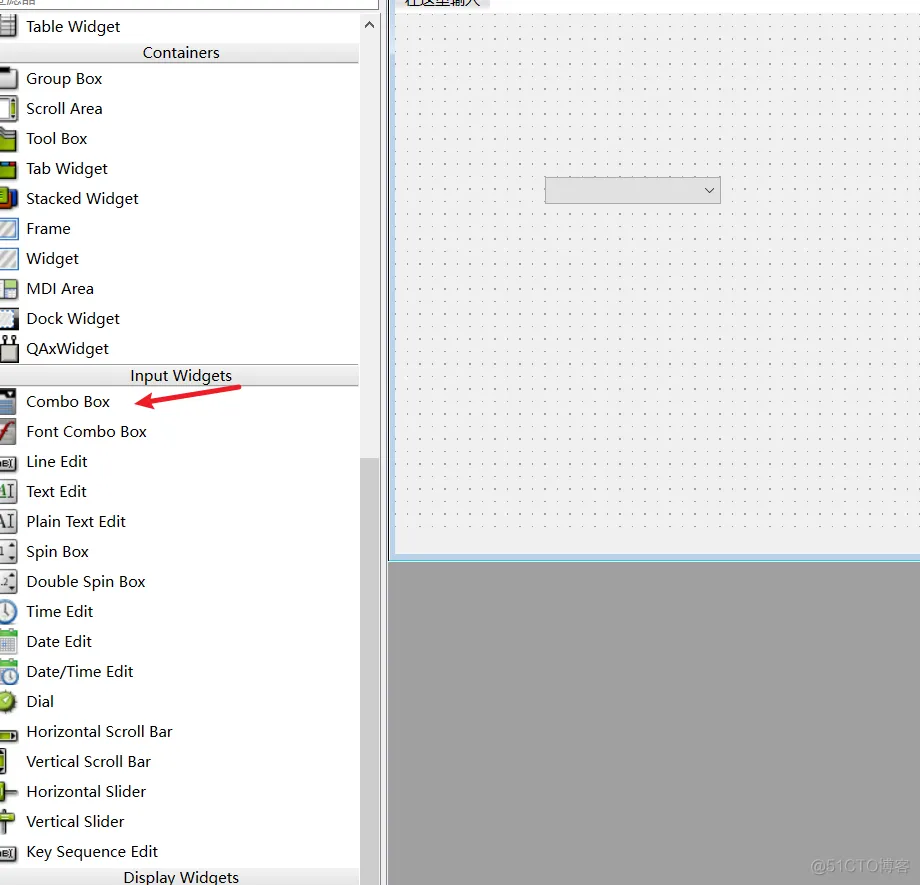
(2)编写子类
import MainWindow
class MainWindowImpl(MainWindow.Ui_MainWindow):
    def __init__(self, window):
        super().__init__()
        self.setupUi(window)
        # 设置下拉值
        self.comboBox.addItem("Option 0")
        self.comboBox.addItem("Option 1")
        self.comboBox.addItem("Option 2")
        self.comboBox.addItem("Option 3")
        # 默认选项
        self.comboBox.setCurrentIndex(2)
        # 设置信号槽 索引改变事件监听,选项变化时会调用
        self.comboBox.currentIndexChanged.connect(self.comboBoxCurrentIndexChanged)
        # 用户一个选项发出时,参数是所选项的索引,还有个重载版本,str类型的,参数是文本
        self.comboBox.activated.connect(self.comboBoxActivated)
    def comboBoxCurrentIndexChanged(self, index):
        print('comboBoxCurrentIndexChanged切换到了' + str(index))
    def comboBoxActivated(self, index):
        print('comboBoxActivated切换到了' + str(index))
1. 2. 3. 4. 5. 6. 7. 8. 9. 10. 11. 12. 13. 14. 15. 16. 17. 18. 19. 20. 21. 22. 23. 24. 25. 26. 27.
(3)QComboBox的信号
QComboBox常用的信号包括:
activated(int):当用户选择一个项时发出,参数是所选项的索引。
activated(str):重载版本,当用户选择一个项时发出,参数是所选项的文本。
currentlndexChanged(int):当下拉列表的当前项改变时发出,参数是新的当前项的索引。
currentTextChanged(str):当下拉列表的当前项文本改变时发出,参数是新的当前项的文本。
highlighted(int):当用户在下拉列表中高亮一个项时发出,参数是高亮项的索引。 5、QTextEdit、QTextBrowser显示文本(1)两者区别
QTextBrowser 继承自 QTextEdit,具有所有 QTextEdit 的功能,并添加了一些额外的功能,特别是用于显示超链接和导航功能的能力,类似于一个简易的网页浏览器。QTextBrowser 可以显示静态的HTML文档,并支持超链接互动。这使得 QTextBrowser 非常适合用作显示只读的、格式化的文本内容,比如帮助文档。
用途:QTextEdit 更适合用于文本编辑,而 QTextBrowser 更适合用于显示格式化的只读文本。
导航功能:QTextBrowser支持链接导航,可以处理内部的超链接事件。
只读属性:QTextBrowser 默认是只读的,而 QTextEdit 默认是可编辑的。
总的来说,如果你需要让用户编辑文本,那么 QTextEdit 是更好的选择。而如果你需要展示带有超链接的只读文本,QTextBrowser是更合适的选择。
(2)ui

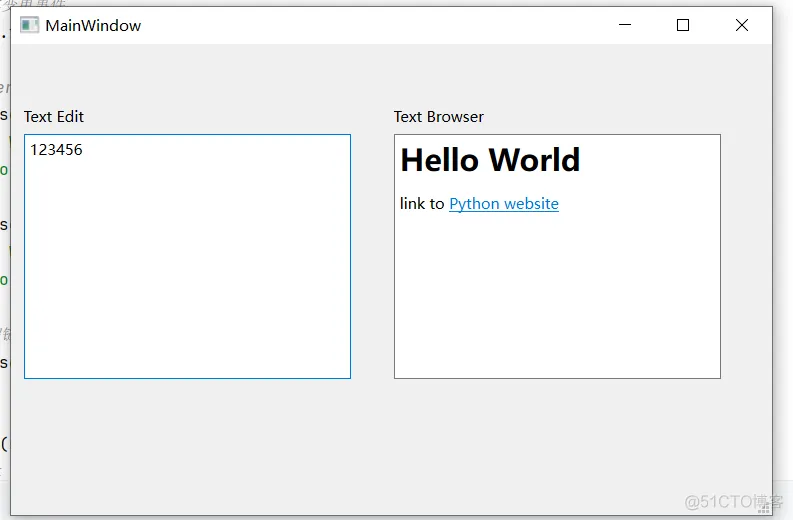
(3)编写子类
import MainWindow
class MainWindowImpl(MainWindow.Ui_MainWindow):
    def __init__(self, window):
        super().__init__()
        self.setupUi(window)
        # 给textEdit设置文本
        self.textEdit.setText("123456")
        # textEdit文本变更事件
        self.textEdit.textChanged.connect(self.onTextChanged)
        # 给textBrowser设置HTML内容
        self.textBrowser.setHtml("""
            <h1>Hello World</h1>
            <p>link to <a href="https://www.python.org">Python website</a></p>
        """)
        self.textBrowser.setText("""
            <h1>Hello World</h1>
            <p>link to <a href="https://www.python.org">Python website</a></p>
        """)
        # 设置可以打开超链接
        self.textBrowser.setOpenExternalLinks(True)
    def onTextChanged(self):
        # 获取里面的文本
        print(self.textEdit.toPlainText())
1. 2. 3. 4. 5. 6. 7. 8. 9. 10. 11. 12. 13. 14. 15. 16. 17. 18. 19. 20. 21. 22. 23. 24. 25. 26. 27. 28.
6、QListView、QListWidget(1)两者区别
QListWidget是一个更高级的控件,提供了接口来添加、删除和管理列表项。
不需要单独设置数据模型(Model),因为QListWidget内部就是一个简单的数据模型。对于简单的列表需求,比如只需展示文本列表项,QListWidget可能是更简单直接的选择。
QListView属于Model/View框架,是一个更灵活、更低级的控件,它需要与一个数据模型(Model)配合使用。
QListView仅仅是一个视图组件,它不存储任何数据,所有的数据都存储在它所连接的模型中。这意味着你需要创建或使用一个数据模型(如QStandardltemModel、自定义模型等),并将其设置给QListView来显示数据。由于是基于模型/视图的,QListView可以用来展示更复杂的数据结构,提供了更高的自定义性和灵活性。你可以控制数据的表示、存储和行为。
如果需求相对简单,比如只需要显示一个文本列表,并对列表项进行一些基本操作,那么QListWidget可能是更简单的选择。
但如果你需要更高的灵活性和定制性,比如显示复杂的数据结构或者需要自定义数据的展示方式,那么使用QListView配合一个合适的数据模型会是更好的选择,也就是说QListView更适合用于需要高度定制或展示复杂数据的场景。
(2)ui
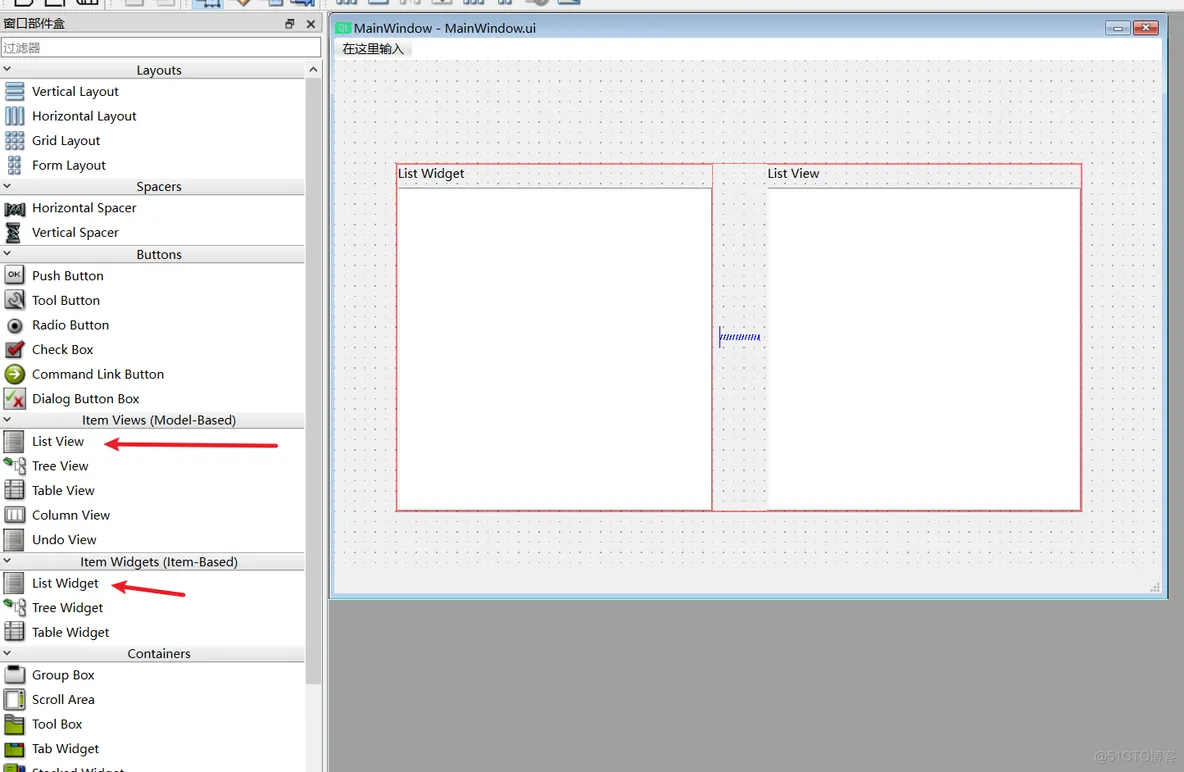
(3)子类
from PySide6.QtCore import QStringListModel
from PySide6.QtWidgets import QListWidgetItem
import MainWindow
from CustomListItem import CustomListItem
class MainWindowImpl(MainWindow.Ui_MainWindow):
    def __init__(self, window):
        super().__init__()
        self.setupUi(window)
        # QListWidget
        firstItem = CustomListItem()
        item = QListWidgetItem(self.listWidget)
        item.setSizeHint(firstItem.sizeHint())
        # 可以设置自定义的QWidget
        self.listWidget.setItemWidget(item, firstItem)
        # 添加列表项
        for i in range(10):
            item = QListWidgetItem(f'item0{i}')
            self.listWidget.addItem(item)
        # QListView
        model = QStringListModel(['itemstr1', 'itemstr2', 'itemstr3', 'itemstr4'])
        self.listView.setModel(model)
1. 2. 3. 4. 5. 6. 7. 8. 9. 10. 11. 12. 13. 14. 15. 16. 17. 18. 19. 20. 21. 22. 23. 24. 25. 26.
(4)自定义的QWidget from PySide6.QtWidgets import QWidget, QHBoxLayout, QLabel, QVBoxLayout, QCheckBox, QPushButton, QMessageBox
# 自定义QWidget
class CustomListItem(QWidget):
def __init__(self):
super().__init__()
self.setFixedSize(100, 50)
main_hLay = QHBoxLayout()
leftLabel = QLabel()
leftLabel.setFixedSize(50, 50)
leftLabel.setText('A')
main_hLay.addWidget(leftLabel)
vLay = QVBoxLayout()
ck = QCheckBox()
ck.setText('开启')
ck.setFixedSize(50, 20)
btn = QPushButton()
btn.setFixedSize(50, 25)
btn.setText('智能润色')
vLay.addWidget(ck)
vLay.addWidget(btn)
main_hLay.addLayout(vLay)
self.setLayout(main_hLay)
btn.clicked.connect(self.onBtnRunse)
def onBtnRunse(self):
QMessageBox.information(None, '提示', '智能润色')
1. 2. 3. 4. 5. 6. 7. 8. 9. 10. 11. 12. 13. 14. 15. 16. 17. 18. 19. 20. 21. 22. 23. 24. 25. 26. 27. 28. 29. 30. 31. 32. 33. 34. 35. 36. 37.
(5)运行效果

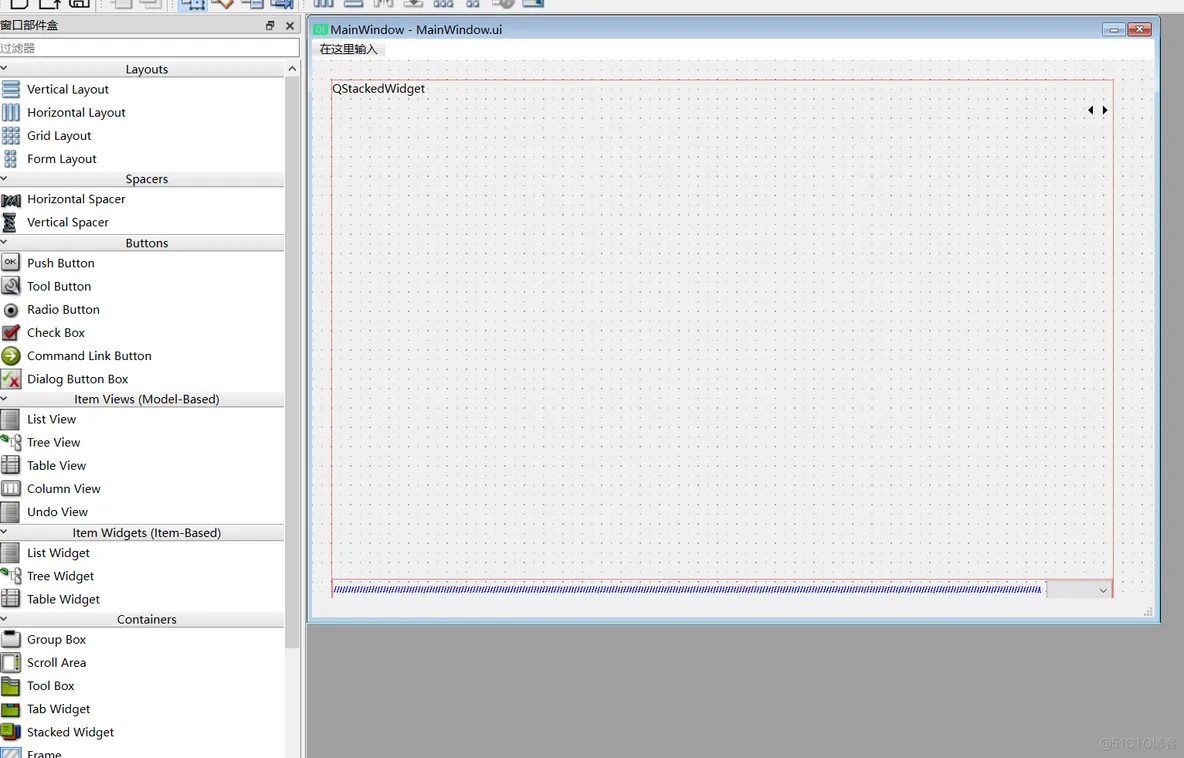
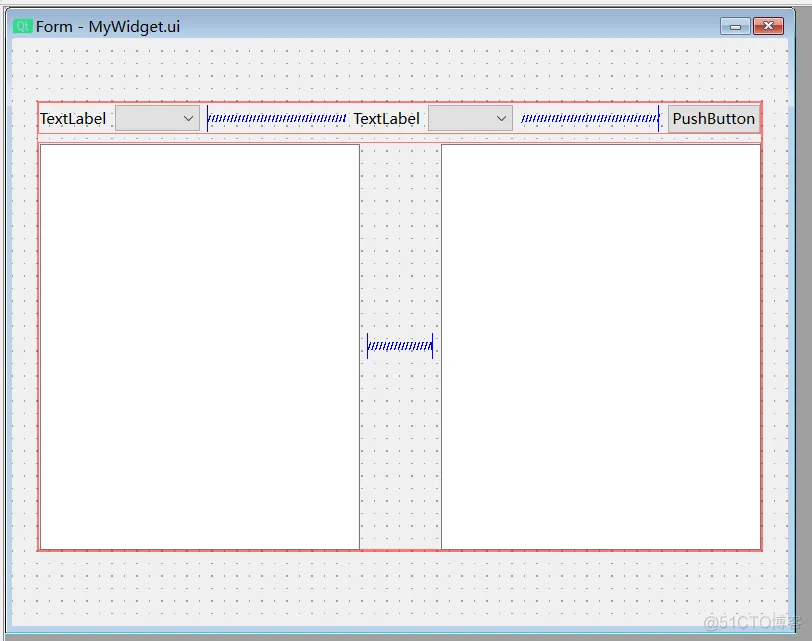
7、QStackedWidget(1)ui
两个ui,其中Widget是QStackedWidget的一个页面。
QStackedWidget默认会创建出两个页面,需要我们删除。
(2)子页面
import MainWindow
import MyWidget
import Pages
# 自定义Widget
class MyWidgetImpl(MyWidget.Ui_Form):
    def __init__(self, Widget):
        super().__init__()
        self.setupUi(Widget)
from PySide6.QtWidgets import QWidget, QHBoxLayout, QLabel, QLineEdit
class Page1(QWidget):
    def __init__(self):
        super().__init__()
        hLay = QHBoxLayout()
        label = QLabel()
        label.setText('page1')
        hLay.addWidget(label)
        lineEdit = QLineEdit()
        lineEdit.setText('这是第一个页面')
        hLay.addWidget(lineEdit)
        self.setLayout(hLay)
class Page2(QWidget):
    def __init__(self):
        super().__init__()
        hLay = QHBoxLayout()
        label = QLabel()
        label.setText('page2')
        hLay.addWidget(label)
        self.setLayout(hLay)
1. 2. 3. 4. 5. 6. 7. 8. 9. 10. 11. 12. 13. 14. 15. 16. 17. 18. 19. 20. 21. 22. 23. 24. 25. 26. 27. 28. 29. 30. 31.
(3)编写子类 from PySide6.QtWidgets import QWidget
import MainWindow
import MyWidgetImpl
import Pages
class MainWindowImpl(MainWindow.Ui_MainWindow):
def __init__(self, window):
super().__init__()
self.setupUi(window)
# 将自定义的QWidget添加到stackedWidget
page1 = Pages.Page1()
page2 = Pages.Page2()
page3 = QWidget()
MyWidgetImpl.MyWidgetImpl(page3)
self.stackedWidget.addWidget(page1)
self.stackedWidget.addWidget(page2)
self.stackedWidget.addWidget(page3)
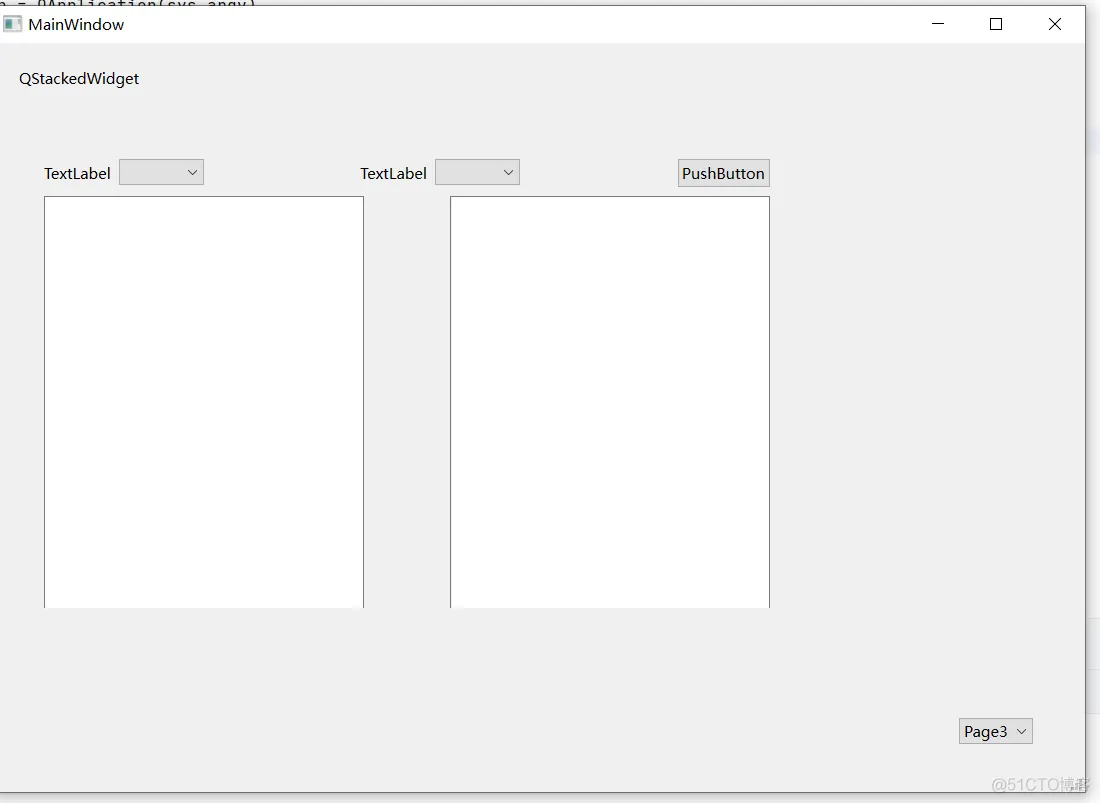
# ComBobox添加东西,随着下拉框可以切换页面
self.comboBox.addItems(['Page1', 'Page2', 'Page3'])
self.comboBox.currentIndexChanged.connect(self.onComboBoxIndexChanged)
def onComboBoxIndexChanged(self, index):
self.stackedWidget.setCurrentIndex(index)
1. 2. 3. 4. 5. 6. 7. 8. 9. 10. 11. 12. 13. 14. 15. 16. 17. 18. 19. 20. 21. 22. 23. 24. 25. 26. 27. 28.
(4)效果
8、QTabWidgetQTabWidget提供了一个选项卡式的界面,允许用户在不同的页面(tab)之间切换。每个页面都是一个独立的小部件,可以包含各种界面元素。
(1)ui

(2)子页面
from PySide6.QtWidgets import QWidget, QHBoxLayout, QLabel
class Tab1(QWidget):
    def __init__(self):
        super().__init__()
        hLay = QHBoxLayout()
        label = QLabel()
        label.setText('tab1')
        hLay.addWidget(label)
        self.setLayout(hLay)
class Tab2(QWidget):
    def __init__(self):
        super().__init__()
        hLay = QHBoxLayout()
        label = QLabel()
        label.setText('tab2')
        hLay.addWidget(label)
        self.setLayout(hLay)
class Tab3(QWidget):
    def __init__(self):
        super().__init__()
        hLay = QHBoxLayout()
        label = QLabel()
        label.setText('tab3')
        hLay.addWidget(label)
        self.setLayout(hLay)
1. 2. 3. 4. 5. 6. 7. 8. 9. 10. 11. 12. 13. 14. 15. 16. 17. 18. 19. 20. 21. 22. 23. 24. 25. 26. 27. 28. 29. 30. 31. 32. 33. 34. 35. 36. 37. 38. 39. 40. 41. 42. 43.
(3)编写子类 import MainWindow
import TabWidget
class MainWindowImpl(MainWindow.Ui_MainWindow):
def __init__(self, window):
super().__init__()
self.setupUi(window)
tab1 = TabWidget.Tab1()
tab2 = TabWidget.Tab2()
tab3 = TabWidget.Tab3()
# 添加页面,位置、Widget、名称
self.tabWidget.insertTab(0, tab1, 'tab01')
self.tabWidget.insertTab(1, tab2, 'tab02')
self.tabWidget.insertTab(2, tab3, 'tab03')
1. 2. 3. 4. 5. 6. 7. 8. 9. 10. 11. 12. 13. 14. 15. 16.
9、QMessageBox消息提示框from PySide6.QtWidgets import QMessageBox, QPushButton, QVBoxLayout, QWidget
import MainWindow
class MainWindowImpl(MainWindow.Ui_MainWindow):
def __init__(self, window):
super().__init__()
self.setupUi(window)
self.window = window
# 创建按钮
window.show_info_button = QPushButton("Show Info Message")
window.show_warning_button = QPushButton("Show Warning Message")
window.ask_question_button = QPushButton("Ask Question")
# 创建垂直布局
layout = QVBoxLayout()
# 将按钮添加到布局
layout.addWidget(window.show_info_button)
layout.addWidget(window.show_warning_button)
layout.addWidget(window.ask_question_button)
# 将布局设置为主窗口的中央部分
central_widget = QWidget()
central_widget.setLayout(layout)
window.setCentralWidget(central_widget)
# 连接按钮的点击信号到槽函数
window.show_info_button.clicked.connect(self.show_info_message)
window.show_warning_button.clicked.connect(self.show_warning_message)
window.ask_question_button.clicked.connect(self.ask_question)
def show_info_message(self):
# 创建信息消息框
QMessageBox.information(self.window, "Info", "This is an information message.")
def show_warning_message(self):
# 创建警告消息框
QMessageBox.warning(self.window, "Warning", "This is a warning message.")
def ask_question(self):
# 创建询问消息框
result = QMessageBox.question(self.window, "Question", "Do you want to proceed?", QMessageBox.Yes | QMessageBox.No)
if result == QMessageBox.Yes:
print("User clicked Yes.")
else:
print("User clicked No.")
1. 2. 3. 4. 5. 6. 7. 8. 9. 10. 11. 12. 13. 14. 15. 16. 17. 18. 19. 20. 21. 22. 23. 24. 25. 26. 27. 28. 29. 30. 31. 32. 33. 34. 35. 36. 37. 38. 39. 40. 41. 42. 43. 44. 45. 46. 47. 48. 49. 50. 51.
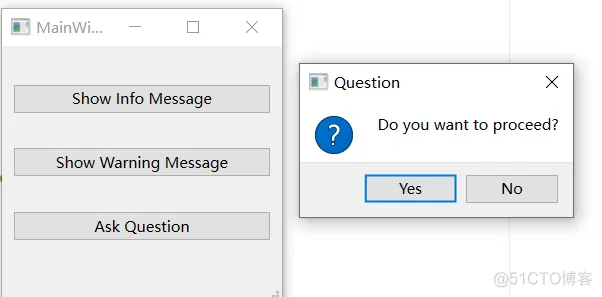
在这个例子中,我们创建了一个主窗口,包含三个按钮,每个按钮分别用于显示信息消息框、警告消息框和询问消息框。
关键的 QMessageBox 静态方法包括:
information(parent, title, text, buttons, defaultButton): 显示信息消息框。
warning(parent, title, text, buttons, defaultButton): 显示警告消息框。
question(parent, title, text, buttons, defaultButton): 显示询问消息框,返回用户的选择。
10、QFileDialog文件选择from PySide6.QtWidgets import QPushButton, QVBoxLayout, QWidget, QFileDialog
import MainWindow
class MainWindowImpl(MainWindow.Ui_MainWindow):
def __init__(self, window):
super().__init__()
self.setupUi(window)
self.window = window
# 创建按钮
window.file_button = QPushButton("choose file")
# 创建垂直布局
layout = QVBoxLayout()
# 将按钮添加到布局
layout.addWidget(window.file_button)
# 将布局设置为主窗口的中央部分
central_widget = QWidget()
central_widget.setLayout(layout)
window.setCentralWidget(central_widget)
# 连接按钮的点击信号到槽函数
window.file_button.clicked.connect(self.show_file_dialog)
def show_file_dialog(self):
# 创建文件对话框
file_dialog = QFileDialog(self.window)
# 设置文件对话框的标题
file_dialog.setWindowTitle("Choose a File")
# 设置对话框模式为打开文件
file_dialog.setFileMode(QFileDialog.ExistingFile)
# 显示文件对话框,并获取用户选择的文件路径
selected_file, _ = file_dialog.getOpenFileName(self.window, "选择一个文件", "", "All Files (*);;Text Files (*.txt)")
# 如果用户选择了文件,将文件路径输出到控制台
if selected_file:
print(f"Selected file: {selected_file}")
1. 2. 3. 4. 5. 6. 7. 8. 9. 10. 11. 12. 13. 14. 15. 16. 17. 18. 19. 20. 21. 22. 23. 24. 25. 26. 27. 28. 29. 30. 31. 32. 33. 34. 35. 36. 37. 38. 39. 40. 41. 42. 43. 44. 45.
在这个例子中,我们创建了一个按钮,点击按钮将弹出文件对话框,并在控制台输出用户选择的文件路径。可以通过 setFileMode 方法设置对话框的模式,例如 QFileDialog.ExistingFile 表示打开一个已存在的文件。
关键的 QFileDialog 方法和属性包括:
getOpenFileName(parent, caption, directory, filter): 打开文件对话框,返回用户选择的文件路径和文件过滤器。
getOpenFileNames(parent, caption, directory, filter): 打开文件对话框,允许用户选择多个文件,返回文件路径列表和文件过滤器。
getExistingDirectory(parent, caption, directory): 打开目录对话框,返回用户选择的目录路径。
getSaveFileName(parent, caption, directory, filter): 打开保存文件对话框,返回用户选择的文件路径和文件过滤器。
11、使用dialog显示loading效果1、创建一个dialog,里面的内容随便填,把最大化、最小化、叉号按钮去掉: # 关闭 最大化最小化等
self.setWindowFlags(Qt.Window | Qt.CustomizeWindowHint | Qt.WindowTitleHint)
2、按钮点击事件 def show_loading_dialog(self):
dialog = LoadingDialog()
self.window.setEnabled(False)
dialog.show()
# 执行逻辑
import time
time.sleep(1)
self.window.setEnabled(True)
dialog.close()
1. 2. 3. 4. 5. 6. 7. 8. 9. 10. 11. 12.
三、布局1、概述各种布局可以多尝试,很多复杂的设计,都是由一个个的Widget整合在一起的。
就像是html的一个个div等控件一样,设置位置。

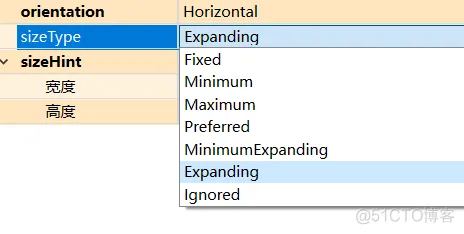
2、弹簧控件QSpacerltem添加弹簧控件通常指的是在布局中添加一个可伸缩的空白区域,以便控件可以按照需要展开或收缩。
这通常是用于在控件之间添加空间,或者将控件推向布局的边缘。 spacer = QSpacerltem(40, 20, QSizePolicy.Expanding, QSizePolicy.Minimum)
layout.addSpacerltem(spacer)
'''
在上面的例子中,QSpacerltem的构造函数接收四个参数:
1.宽度(40)
2.高度(20)
3.宽度策略(OSizePolicy.Expanding)这意味着弹簧控件可以扩展,以填充布局中的任何额外空间。
4.高度策略OSizePolicy.Minimum):这意味着弹簧控件的高度保持最小值不会扩展。
通过将OSpacerltem添加到布局中,Button1和Button2会被推到窗口的两侧
'''
3、布局里常用的函数addWidget(widget,stretch=0):将小部件添加到布局中。stretch参数用于指定小部件拉伸的比例。
addLayout(layout,stretch=0):将另一个布局嵌套到当前布局中。这允许创建复杂的布局结构。
setSpacing(spacing):设置布局中小部件之间的间距。
setMargin(margin):设置布局边缘与其容器边缘之间的距离。在最新版本的Qt中,可能需要使用setContentsMargins()来替代此功能。
setAlignment(widget,alignment):设置小部件相对于其分配空间的对齐方式例如,Qt.AlignCenter、Qt.AlignLeft等。
4、栅格布局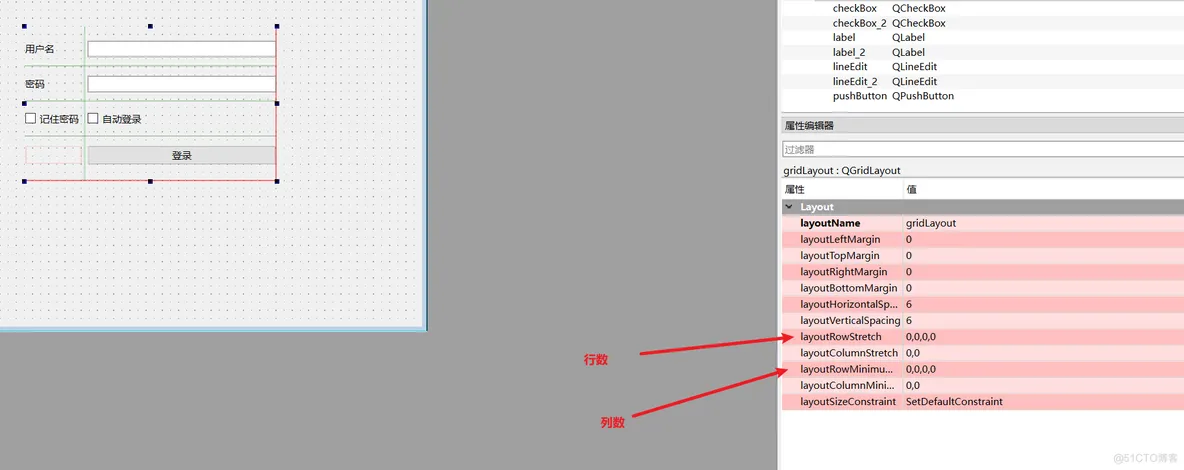
5、表单布局QFormLayout设计上主要用于单列布局,每一行通常包含一个标签和一个字段(或者两个相关的窗口小部件),因此它自然支持多行但本质上是单列的布局。对于需要多行多列布局的情况,则需要使用QGridLayout。

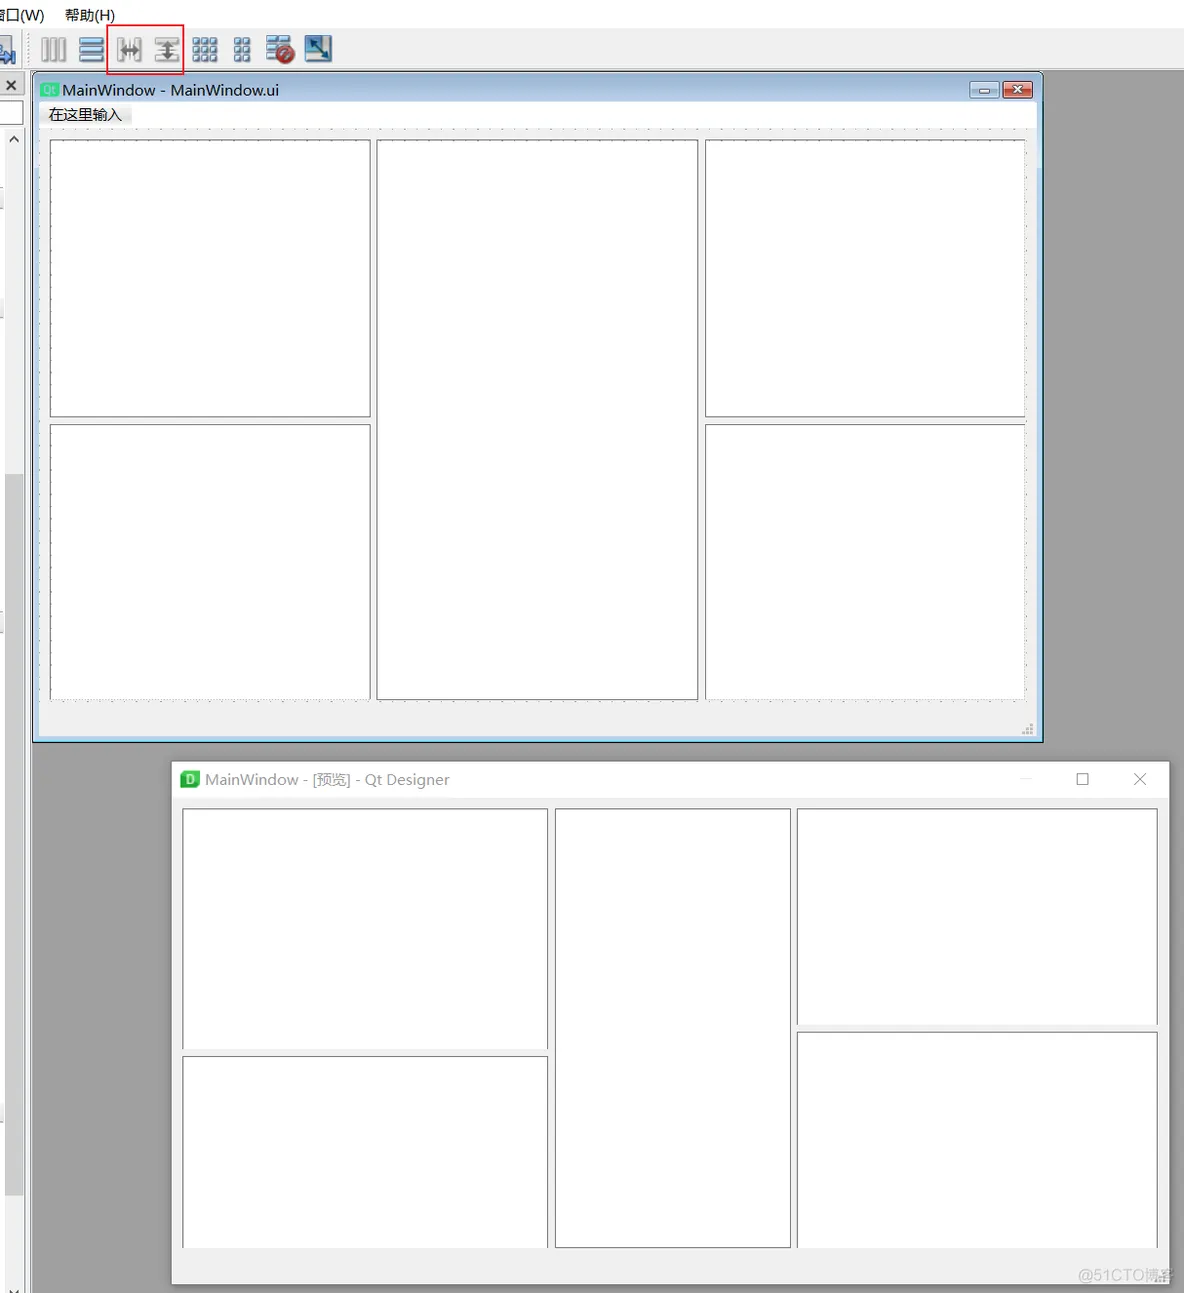
6、分裂器布局分裂器布局,两个组件之间是可以拖动的
7、绝对布局move(x, y) 对于一些位置固定的控件,需要使用绝对布局,直接根据坐标写位置。
如果有蓝湖设计图,绝对布局很轻松。

四、信号槽与事件机制1、普通槽函数使用from PySide6.QtWidgets import QMessageBox
import MainWindow
class MainWindowImpl(MainWindow.Ui_MainWindow):
def __init__(self, window):
super().__init__()
self.setupUi(window)
# 槽函数,绑定鼠标点击按钮事件
self.pushButton.clicked.connect(self.onPushButtonClicked)
def onPushButtonClicked(self):
QMessageBox.information(None, "Hello", "Hello World")
1. 2. 3. 4. 5. 6. 7. 8. 9. 10. 11. 12. 13. 14.
2、鼠标事件from PySide6.QtCore import Qt
import MainWindow
class MainWindowImpl(MainWindow.Ui_MainWindow):
def __init__(self, window):
super().__init__()
self.setupUi(window)
window.setMouseTracking(True) # 开启鼠标追踪
# 事件 ,注意,事件是在QWidget中的
window.mousePressEvent = self.mousePressEvent
window.mouseReleaseEvent = self.mouseReleaseEvent
window.mouseMoveEvent = self.mouseMoveEvent
window.wheelEvent = self.wheelEvent
window.mouseDoubleClickEvent = self.mouseDoubleClickEvent
def mousePressEvent(self, event):
if event.button() == Qt.LeftButton:
print("左键")
elif event.button() == Qt.RightButton:
print("右键")
elif event.button() == Qt.MiddleButton:
print("中键")
def mouseReleaseEvent(self, event):
if event.button() == Qt.LeftButton:
print("左键释放")
elif event.button() == Qt.RightButton:
print("右键释放")
elif event.button() == Qt.MiddleButton:
print("中键释放")
def mouseDoubleClickEvent(self, event):
if event.button() == Qt.LeftButton:
print("左键双击")
elif event.button() == Qt.RightButton:
print("右键双击")
elif event.button() == Qt.MiddleButton:
print("中键双击")
def mouseMoveEvent(self, event):
print("鼠标移动")
print("x:", event.x(), "y:", event.y())
def wheelEvent(self, event):
print("鼠标滚轮")
print("滚动值:", event.angleDelta().y())
y = event.angleDelta().y()
# mac和windows的滚动方向相反 y > 0 向上滚动 y < 0 向下滚动
if y > 0:
print(f"y = {y}")
print("向上滚动")
else:
print(f"y = {y}")
print("向下滚动")
1. 2. 3. 4. 5. 6. 7. 8. 9. 10. 11. 12. 13. 14. 15. 16. 17. 18. 19. 20. 21. 22. 23. 24. 25. 26. 27. 28. 29. 30. 31. 32. 33. 34. 35. 36. 37. 38. 39. 40. 41. 42. 43. 44. 45. 46. 47. 48. 49. 50. 51. 52. 53. 54. 55. 56. 57. 58. 59. 60. 61. 62. 63. 64. 65.
3、键盘事件from PySide6.QtCore import Qt
import MainWindow
class MainWindowImpl(MainWindow.Ui_MainWindow):
def __init__(self, window):
super().__init__()
self.setupUi(window)
window.keyPressEvent = self.keyPressEvent
window.keyReleaseEvent = self.keyReleaseEvent
def keyPressEvent(self, event):
key = event.key()
print(f"按下了键盘键:{event.text()}")
if key == Qt.Key_Escape:
print(f"按下了键盘esc键:{event.text()}")
elif key == Qt.Key_Enter or key == Qt.Key_Return:
print(f"按下了键盘回车键:{event.text()}")
def keyReleaseEvent(self, event):
print(f"释放了键盘键:{event.text()}")
1. 2. 3. 4. 5. 6. 7. 8. 9. 10. 11. 12. 13. 14. 15. 16. 17. 18. 19. 20. 21. 22. 23. 24. 25. 26. 27.
4、组合按键事件from PySide6.QtCore import Qt
import MainWindow
class MainWindowImpl(MainWindow.Ui_MainWindow):
def __init__(self, window):
super().__init__()
self.setupUi(window)
window.mousePressEvent = self.mousePressEvent
window.mouseReleaseEvent = self.mouseReleaseEvent
window.keyPressEvent = self.keyPressEvent
window.keyReleaseEvent = self.keyReleaseEvent
def mousePressEvent(self, event):
if event.modifiers() & Qt.ControlModifier:
if event.button() == Qt.LeftButton:
print('ctrl +鼠标左键')
def mouseReleaseEvent(self, event):
print('按键已弹起')
def keyPressEvent(self, event):
key = event.key()
if event.modifiers() & Qt.ControlModifier:
if key == Qt.Key_S:
print('ctrl + S')
def keyReleaseEvent(self, event):
print('按键已弹起')
1. 2. 3. 4. 5. 6. 7. 8. 9. 10. 11. 12. 13. 14. 15. 16. 17. 18. 19. 20. 21. 22. 23. 24. 25. 26. 27. 28. 29. 30. 31. 32. 33.
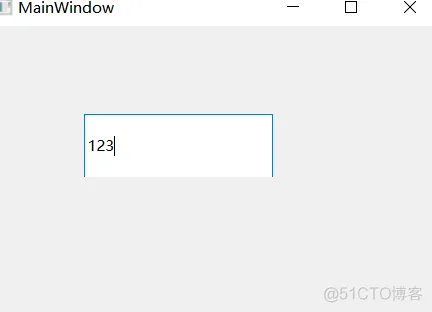
5、事件过滤from PySide6.QtCore import Qt, QEvent
from PySide6.QtWidgets import QLineEdit, QVBoxLayout
import MainWindow
class MainWindowImpl(MainWindow.Ui_MainWindow):
def __init__(self, window):
super().__init__()
self.setupUi(window)
# lineEdit添加过滤器
self.lineEdit.installEventFilter(window)
window.eventFilter = self.eventFilter
def eventFilter(self, watched, event):
if event.type() == QEvent.KeyPress:
# 空格、enter等不允许输入
if event.key() in (Qt.Key_Backspace, Qt.Key_Enter, Qt.Key_Return, Qt.Key_Delete):
return False
# 数字不允许输入
if event.text().isdigit():
return False
return True
return False
1. 2. 3. 4. 5. 6. 7. 8. 9. 10. 11. 12. 13. 14. 15. 16. 17. 18. 19. 20. 21. 22. 23. 24. 25. 26. 27. 28. 29. 30.
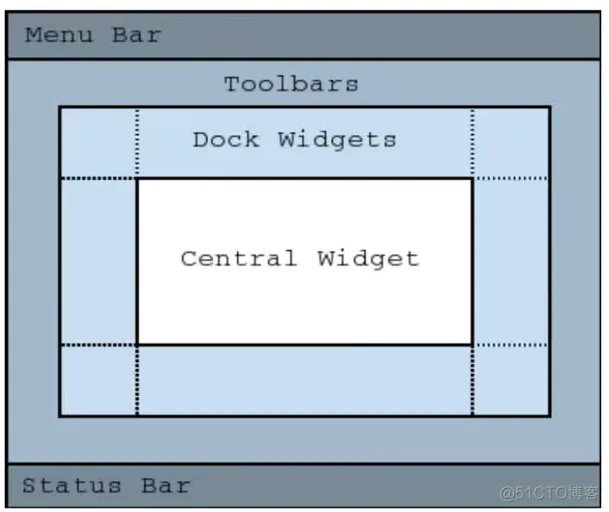
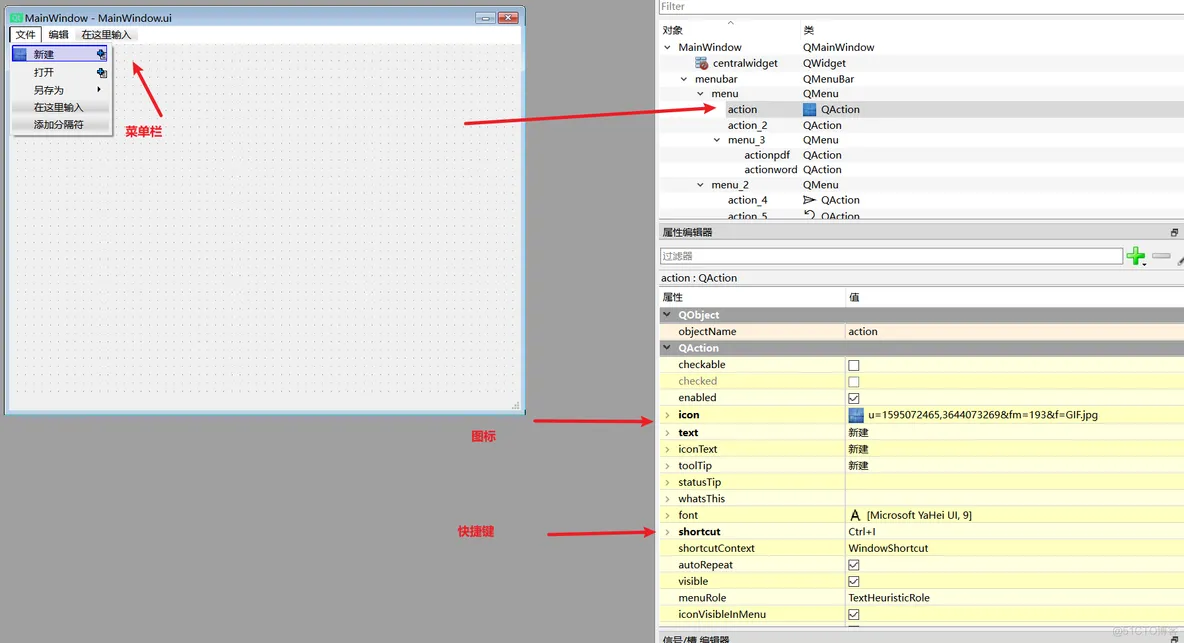
五、QMainWindow使用介绍1、简介QMainWindow包含菜单栏、工具栏、状态栏等。

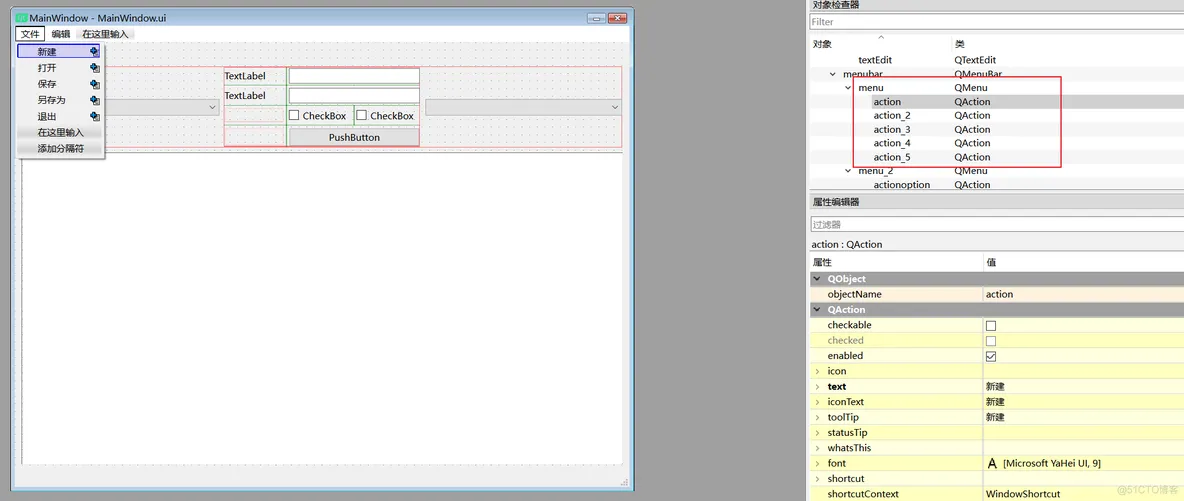
2、菜单栏注意,使用QT设计器,菜单栏的子菜单是无法直接输入中文的,需要粘贴进去
import MainWindow
import Resources # 资源!
class MainWindowImpl(MainWindow.Ui_MainWindow):
    def __init__(self, window):
        super().__init__()
        self.setupUi(window)
		# 注意,图标貌似只能选一些内置的,想要自定义图片,需要手动设置
		self.action.setIcon(QIcon(':test'))
        # 菜单信号,点击事件
        self.action.triggered.connect(self.actionTriggered)
    def actionTriggered(self):
        print('点击了')
1. 2. 3. 4. 5. 6. 7. 8. 9. 10. 11. 12. 13. 14. 15. 16.
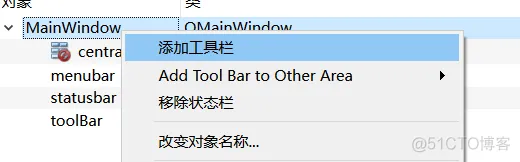
3、工具栏工具栏需要手动添加:

from PySide6.QtGui import QIcon
import MainWindow
import Resources
class MainWindowImpl(MainWindow.Ui_MainWindow):
    def __init__(self, window):
        super().__init__()
        self.setupUi(window)
		# 注意,图标貌似只能选一些内置的,想要自定义图片,需要手动设置
        self.action.setIcon(QIcon(':t1'))
        # 工具栏信号,点击事件
        self.action.triggered.connect(self.actionTriggered)
    def actionTriggered(self):
        print('点击了')
1. 2. 3. 4. 5. 6. 7. 8. 9. 10. 11. 12. 13. 14. 15. 16. 17. 18.
4、状态栏import MainWindow
import Resources
class MainWindowImpl(MainWindow.Ui_MainWindow):
def __init__(self, window):
super().__init__()
self.setupUi(window)
# 状态栏,设置文字
self.statusbar.showMessage('初始状态')
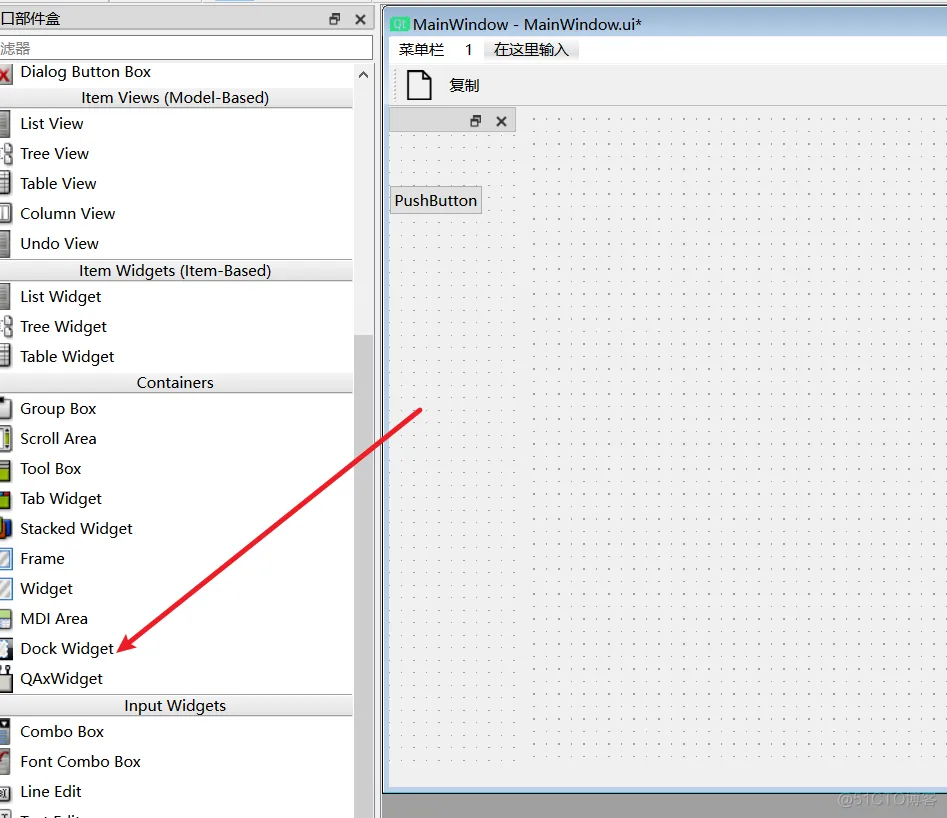
5、QDockWidget使用 addDockwidget()将停靠窗口添加到主窗口的不同区域(例如左侧、顶部、底部或者右侧)。
QDockWidget 可以通过用户操作在停靠状态和浮动状态之间切换 #创建停靠窗口
dock = QDockWidget("Dockable",self)
self.addDockWidget(Qt.RightDockWidgetArea, dock)
注意:dockwidget只能在QMainWindow里使用,QWidget、QDialog不行
六、样式表qss1、概述Qt style sheet,简写就是qss,也可以称为Qt样式表,qss功能类似于css,可以直接修改控件窗口样式。
注意,如果使用资源的话,需要先import Resources # 示例
QLabel
{
background-color: rgb(54,54,54); /*背景色*/
color: rgb(230,230,230); /*字体颜色,前景色*/
font-family: "Microsoft YaHei"; /*字体类型*/
/*字体大小*/
}
样式的设置有两种,一种是在ui设计器中直接写:

还有一种是在代码中编写:
qss06 = '''
	QPushButton
    {
        background-image:url(":search32");
        background-position:center;
        background-repeat: no-repeat;
        border:none
    }

    QPushButton:hover
    {
        background-color:rgb(10,210,210);
        background-image:url(":search32")
    }

    QPushButton:pressed
    {
        background-color:rgb(10,210,210);
        background-image:url(":search32");
        padding-left:8px;
        padding-top:8px;
    }
'''
self.btnSearch.setFixedSize(32, 32)
self.btnSearch.setText('')
self.btnSearch.setStyleSheet(qss06)
1. 2. 3. 4. 5. 6. 7. 8. 9. 10. 11. 12. 13. 14. 15. 16. 17. 18. 19. 20. 21. 22. 23. 24. 25. 26. 27.
2、通用组件常用样式/*
字体样式
font-family :为设置字体类型,标准形式需要加双引号,不加也可能会生效,具体看系统是否支持,中英文都支持,但要保证字体编码支持,一般程序编码为"utf-8"时没问题。
font-size:为设置字体大小,单位一般使用 px 像素
font-style:为设置字体斜体样式,italic为斜体,normal为不斜体
font-weight :为设置字体加粗样式,bold 为加粗,normal 为不加粗
color:为设置字体颜色,可以使用十六进制数表示颜色,也可以使用某些特殊的字体颜色:red,green, blue 等,或者使用rgb(r,g,b)和 rgba(r,g,b,a)来设置,其中r、g、b、a值为0~255,如果想不显示颜色可以设置值为透明 transparent;注意:字体颜色用的是 color 属性,没有 font-color 这个属性
*/
font-family:"Microsoft YaHei";
font-style: italic;
font-weight: bold;
color:#123456;
/*
也可以一起设置
同时设置字体 style weight size family 的样式时,style(是否斜体)和 weight(是否加粗)必须出现在开头,size 和 family 在后面,而且 size 必须在 family 之前,否则样式将不生效
*/
font: bold italic 18px "Microsoft YaHei";
1. 2. 3. 4. 5. 6. 7. 8. 9. 10. 11. 12. 13. 14. 15. 16. 17. 18. 19. 20. 21. 22. 23.
/*
边框样式
solid 为实线, dashed 为虚线, dotted 为点线, none 为不显示(如果不设置 border-style 的话,默认带边框)
*/
QLabel
{
	border-style: solid;
	/*单独设置某一边 border-right-style:dotted;*/
	border-width:2px;
	border-color: red;
}
/*也可以一起设置*/
border: 2px solid red;
/*也可以单独属性设置top、right、bottom、left*/
border-top-style: solid;
border-top-width:2px;
border-top-color: red;
border-top: 2px solid red;
border-right-style: solid;
border-right-width: 3px;
border-right-color: green;
border-right: 3px solid green;
border-bottom-style: solid;
border-bottom-width: 2px;
border-bottom-color: blue;
border-bottom: 2px solid blue;
border-left-style: solid;
border-left-width: 3px;
border-left-color: aqua;
border-left: 3px solid aqua;
/*设置边框半径(圆角),这个半径需要合适,否则没效果*/
border-top-left-radius:5px;
border-top-right-radius: 10px;
border-bottom-left-radius:15px;
border-bottom-right-radius:20px;
border-radius:20px;/*统一的半径*/
1. 2. 3. 4. 5. 6. 7. 8. 9. 10. 11. 12. 13. 14. 15. 16. 17. 18. 19. 20. 21. 22. 23. 24. 25. 26. 27. 28. 29. 30. 31. 32. 33. 34. 35. 36. 37. 38. 39.
/*
文字位置
在 qss 中,没有对齐方式,只能通过设置 padding 来实现文字的显示位置;一般 padding-left 相当于x坐标,padding-top 相当
于y坐标,设置这两个就可以在任意位置显示了(默认情况下文字是上下左右都居中显示的)
*/
padding-left: 10px;
padding-top:8px;
padding-right: 7px;
padding-bottom: 9px;
/*
背景样式
background-color 为设置背景颜色,可以使用十六进制数表示颜色,也可以使用某些特殊的字体颜色:red,green, blue等,或者使用rgb(r,g,b)和 rgba(r,g,b,a)来设置,其中r、g、b、a值为0~255,如果想不显示颜色可以设置值为透明transparent
background-image 为设置背景图片,图片路径为 url(image-path)
background-repeat 为设置背景图是否重复填充背景,如果背景图片尺寸小于背景实际大小的话,默认会自动重复填充图片,可以设置为 no-repeat不重复,repeat-x在x轴重复,repeat-y 在y轴重复
background-position 为设置背景图片显示位置,只支持 left right top bottom center;值 left right center 为设置水平位置,值 top bottom center 为设置垂直位置
*/
background-color:rgb(54,54,54);
background-image:url(:/imgs/picture/0.png);/*显示背景图片,也可以不用引号*/
background-repeat:no-repeat;/*不重复显示*/
background-position:left center;
/*
可以统一设置
background 为设置背景的所有属性,color image repeat position 这些属性值出现的顺序可以任意
*/
background: url(":/imgs/picture/0.png") no-repeat left center #363636;
1. 2. 3. 4. 5. 6. 7. 8. 9. 10. 11. 12. 13. 14. 15. 16. 17. 18. 19.
/*动态悬浮样式,鼠标移上去会产生的样式*/
QLabel:hover
{
	color: red;
	border-color: green;
	background-color:#363636;
}
/*禁止使用的样式,*/
QLabel:disabled
{
	color: blue;
	border-color: brown;
	background-color:#363636;
}
3、QLineEdit组件常用样式// 这不是css,python代码里写的
setReadonly(false);//只读
setFocusPolicy(Qt::NoFocus);//无法获得焦点
setMaxLength(10);//最多输入10个字符
// 文本对其方式
1ineedit->setAlignment(Qt::AlignLeft)//左对齐
1ineedit->setAlignment(Qt::AlignRight)//右对齐
1ineedit->setAlignment(Qt::Aligncenter)//居中对齐
// 正数控制
// 第一个数是1-9的,第二个数和之后的是0-9的
QRegExp regx("[1-9][0-9]+$");
QValidator *validator = new QRegExpValidator(regx, ui->lineEdit);
lineEdit->setValidator(validator);
1. 2. 3. 4. 5. 6. 7. 8. 9. 10. 11. 12. 13. 14. 15.
/*样式*/
QLineEdit{
    border: 1px solid #ABCDA0;      /* 边框宽度为1px,颜色为#A0A0A0 */
    border-radius: 3px;         /* 边框圆角 */
    padding-left: 5px;           /* 文本距离左边界有5px */
    background-color: #F2F2F2;     /* 背景颜色 */
    color: #A0A0A0;     /* 文本颜色 */
    selection-background-color: #A0A0A0;     /* 选中文本的背景颜色 */
    selection-color: #F2F2F2;    /* 选中文本的颜色 */
    font-family: "Microsoft YaHei";    /* 文本字体族 */
    font-size: 10px;    /* 文本字体大小 */
}
QLineEdit:hover { /* 鼠标悬浮在QLineEdit时的状态 */
    border: 1px solid #298DFF;
    border-radius: 3px;
    background-color: #F2F2F2;
    color: #298DFF;
    selection-background-color: #298DFF;
    selection-color: #F2F2F2;
}
QLineEdit[echoMode="2"] { /* QLineEdit有输入掩码时的状态 */
    lineedit-password-character: 9679;
    lineedit-password-mask-delay: 2000;
}
QLineEdit:disabled { /* QLineEdit在禁用时的状态 */
    border: 1px solid #CDCDCD;
    background-color: #CDCDCD;
    color: #B4B4B4;
}
QLineEdit:read-only { /* QLineEdit在只读时的状态 */
    background-color: #CDCDCD;
    color: #F2F2F2;
}
1. 2. 3. 4. 5. 6. 7. 8. 9. 10. 11. 12. 13. 14. 15. 16. 17. 18. 19. 20. 21. 22. 23. 24. 25. 26. 27. 28. 29. 30. 31. 32. 33. 34. 35. 36. 37.
4、QpushButton常用样式QPushButton
{
/*前景色,文字的颜色 */
color:green;
/*背景色 */
background-color:rgb(223,223,223);
/*边框风格 */
border-style:outset;
/*边框宽度 */
border-width:0.5px;
/*边框颜色 */
border-color:rgb(10,45,110);
/*边框倒角 */
border-radius:10px;
/* 字体 */
font:bold 22px;
/*控件最小宽度*/
min-width:100px;
/*控件最小高度 */
min-height:20px;
/*内边距 */
padding :4px;
}
/*鼠标按下时的效果,加上#可以指定哪个按钮的pressed事件*/
QPushButton#pushButton:pressed
{
/*改变背景色 */
background-color:rgb(40,85,20);
/*改变边框风格 */
border-style:inset;
/*使文字有一点移动 */
padding-left:6px;
padding-top:6px;
}
/*按钮样式 */
QPushButton:flat
{
border:2px solid red;
}
/*鼠标悬浮时的效果*/
QPushButton:hover
{
color:#0000ff;
background-color:rgb(210,205,205);/*改变背景色*/
border-style:inset;/*改变边框风格*/
padding-left:8px;
padding-top:8px;
}
/*鼠标悬浮时的效果,指定某个按钮*/
QPushButton#btn2:hover
{
color:#0000ff;
background-color:rgb(100,100,20);/*改变背景色*/
border-style:inset;/*改变边框风格*/
padding-left:8px;
padding-top:8px;
}
1. 2. 3. 4. 5. 6. 7. 8. 9. 10. 11. 12. 13. 14. 15. 16. 17. 18. 19. 20. 21. 22. 23. 24. 25. 26. 27. 28. 29. 30. 31. 32. 33. 34. 35. 36. 37. 38. 39. 40. 41. 42. 43. 44. 45. 46. 47. 48. 49. 50. 51. 52. 53. 54. 55. 56. 57. 58. 59. 60. 61.
/*状态相关*/
:checked   		button部件被选中
:unchecked		button部件未被选中
:disabled		部件被禁用
:enabled		部件被启用
:focus			部件获得焦点
:hover			鼠标位于部件上
:pressed		部件被鼠标按下
:indeterminate	checkbox或radiobutton被部分选中
:off			部件可以切换,且处于off状态
:on				部件可以切换,且处于on状态
/*可以设置背景图片*/
QPushButton
{
    background-image:url(":search32");
    background-position:center;
    background-repeat: no-repeat;
    border:none
}
QPushButton:hover
{
    background-color:rgb(10,210,210);
    background-image:url(":search32")
}
QPushButton:pressed
{
    background-color:rgb(10,210,210);
    background-image:url(":search32");
    padding-left:8px;
    padding-top:8px;
}
1. 2. 3. 4. 5. 6. 7. 8. 9. 10. 11. 12. 13. 14. 15. 16. 17. 18. 19. 20. 21. 22.
5、QSlider常用样式(1)水平滑动条

QSlider
{
    background-color: #363636;
	border-style: outset;
	border-radius: 10px;
}

QSlider::groove:horizontal
{
	height: 14px;
	background: qlineargradient(x1:0, y1:0, x2:0, y2:1, stop:0 #B1B1B1, stop:1 #c4c4c4);
	margin: 2px 0
}

QSlider::handle:horizontal
{
	background: QRadialGradient(cx:0, cy:0, radius: 1, fx:0.5, fy:0.5, stop:0 white, stop:1 green);
	width: 16px;
	height: 16px;
	margin: -5px 6px -5px 6px;
	border-radius:11px;
	border: 3px solid #ffffff;
}
1. 2. 3. 4. 5. 6. 7. 8. 9. 10. 11. 12. 13. 14. 15. 16. 17. 18. 19. 20. 21. 22. 23.
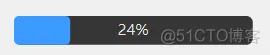
QProgressBar
{
      background:rgb(54,54,54);
      border:none;   /*无边框*/
      border-radius:5px;
      text-align:center;   /*文本的位置*/
      color: rgb(229, 229, 229);  /*文本颜色*/
}

QProgressBar::chunk
{
      background-color:rgb(58, 154, 255);
      border-radius:4px;
}
1. 2. 3. 4. 5. 6. 7. 8. 9. 10. 11. 12. 13. 14.
(2)竖直滑动条 QSlider
{
background-color: rgba(22, 22, 22, 0.7);
padding-top: 15px; /*上面端点离顶部的距离*/
padding-bottom: 15px;
border-radius: 5px; /*外边框矩形倒角*/
}
QSlider::add-page:vertical
{
background-color: #FF7826;
width:5px;
border-radius: 2px;
}
QSlider::sub-page:vertical
{
background-color: #7A7B79;
width:5px;
border-radius: 2px;
}
QSlider::groove:vertical
{
background:transparent;
width:6px;
}
QSlider::handle:vertical
{
height: 14px;
width: 14px;
margin: 0px -4px 0px -4px;
border-radius: 7px;
background: white;
}
1. 2. 3. 4. 5. 6. 7. 8. 9. 10. 11. 12. 13. 14. 15. 16. 17. 18. 19. 20. 21. 22. 23. 24. 25. 26. 27. 28. 29. 30. 31. 32. 33. 34. 35. 36.
6、QComboBox常用样式
/* 未下拉时,QComboBox的样式 */
QComboBox
{
    background:rgb(54,54,54);
    border: 1px solid gray;   /* 边框 */
    border-radius: 5px;   /* 圆角 */
    padding: 1px 18px 1px 3px;   /* 字体填衬 */
    color: white;
    font: normal normal 24px "Microsoft YaHei";
}
/* 未下拉时,QComboBox的样式 */
QComboBox
{
    border: 1px solid gray;   /* 边框 */
    border-radius: 5px;   /* 圆角 */
    padding: 1px 18px 1px 3px;   /* 字体填衬 */
    color: white;
    font: normal normal 24px "Microsoft YaHei";
    background:rgb(54,54,54);
}
/* 下拉后,整个下拉窗体样式 */
QComboBox QAbstractItemView
{
    outline: 0px solid gray;   /* 选定项的虚框 */
    border: 1px solid yellow;   /* 整个下拉窗体的边框 */
    color: rgb(250,251,252);
    background-color: rgb(70,80,90);   /* 整个下拉窗体的背景色 */
    selection-background-color: lightgreen;   /* 整个下拉窗体被选中项的背景色 */
}
/* 下拉后,整个下拉窗体每项的样式 */
/* 项的高度(设置pComboBox->setView(new QListView(this));后该项才起作用) */
QComboBox QAbstractItemView::item
{
    height: 50px;
}
/* 下拉后,整个下拉窗体越过每项的样式 */
QComboBox QAbstractItemView::item:hover
{
    color: rgb(90,100,105);
    background-color: lightgreen;   /* 整个下拉窗体越过每项的背景色 */
}
/* 下拉后,整个下拉窗体被选择的每项的样式 */
QComboBox QAbstractItemView::item:selected
{
    color: rgb(12, 23, 34);
    background-color: lightgreen;
}
/* QComboBox中的垂直滚动条 */
QComboBox QAbstractScrollArea QScrollBar:vertical
{
    width: 13px;
    background-color: #d0d2d4;   /* 空白区域的背景色*/
}
QComboBox QAbstractScrollArea QScrollBar::handle:vertical
{
    border-radius: 5px;   /* 圆角 */
    background: rgb(60,60,60);   /* 小方块的背景色深灰lightblue */
}
QComboBox QAbstractScrollArea QScrollBar::handle:vertical:hover
{
    background: rgb(90, 91, 93);   /* 越过小方块的背景色yellow */
}
/* 设置为可编辑(setEditable(true))editable时,编辑区域的样式 */
QComboBox:editable
{
    background: green;
}
/* 设置为非编辑(setEditable(false))!editable时,整个QComboBox的样式 */
QComboBox:!editable
{
     background: rgb(54,54,54);
}
/* 设置为可编辑editable时,点击整个QComboBox的样式 */
QComboBox:editable:on
{
    background: rgb(54,54,54);
}
/* 设置为非编辑!editable时,点击整个QComboBox的样式 */
QComboBox:!editable:on
{
     background: rgb(54,54,54);
}
/* 设置为可编辑editable时,下拉框的样式 */
QComboBox::drop-down:editable
{
    background: rgb(54,54,54);
}
/* 设置为可编辑editable时,点击下拉框的样式 */
QComboBox::drop-down:editable:on
{
    background: rgb(54,54,54);
}
/* 设置为非编辑!editable时,下拉框的样式 */
QComboBox::drop-down:!editable
{
    background: rgb(54,54,54);
}
/* 设置为非编辑!editable时,点击下拉框的样式 */
QComboBox::drop-down:!editable:on
{
    background: rgb(54,54,54);
    image: url(:/resources/up.png); /* 显示上拉箭头 */
}
/* 下拉框样式 */
QComboBox::drop-down
{
    subcontrol-origin: padding;   /* 子控件在父元素中的原点矩形。如果未指定此属性,则默认为padding。 */
    subcontrol-position: top right;   /* 下拉框的位置(右上) */
    width: 32px;   /* 下拉框的宽度 */
    border-left-width: 1px;   /* 下拉框的左边界线宽度 */
    border-left-color: darkgray;   /* 下拉框的左边界线颜色 */
    border-left-style: solid;   /* 下拉框的左边界线为实线 */
    border-top-right-radius: 3px;   /* 下拉框的右上边界线的圆角半径(应和整个QComboBox右上边界线的圆角半径一致) */
    border-bottom-right-radius: 3px;   /* 同上 */
    image: url(:/resources/down.png);
}
/* 越过下拉框样式 */
QComboBox::drop-down:hover
{
    background: rgb(80, 75, 90);
}
/* 下拉箭头样式 */
QComboBox::down-arrow
{
    width: 32px; /* 下拉箭头的宽度(建议与下拉框drop-down的宽度一致) */
    background: rgb(54,54,54); /* 下拉箭头的的背景色 */
    padding: 0px 0px 0px 0px; /* 上内边距、右内边距、下内边距、左内边距 */
    image: url(:/resources/down.png);
}
/* 点击下拉箭头 */
QComboBox::down-arrow:on
{
    image: url(:/resources/up.png); /* 显示上拉箭头 */
}
1. 2. 3. 4. 5. 6. 7. 8. 9. 10. 11. 12. 13. 14. 15. 16. 17. 18. 19. 20. 21. 22. 23. 24. 25. 26. 27. 28. 29. 30. 31. 32. 33. 34. 35. 36. 37. 38. 39. 40. 41. 42. 43. 44. 45. 46. 47. 48. 49. 50. 51. 52. 53. 54. 55. 56. 57. 58. 59. 60. 61. 62. 63. 64. 65. 66. 67. 68. 69. 70. 71. 72. 73. 74. 75. 76. 77. 78. 79. 80. 81. 82. 83. 84. 85. 86. 87. 88. 89. 90. 91. 92. 93. 94. 95. 96. 97. 98. 99. 100. 101. 102. 103. 104. 105. 106. 107. 108. 109. 110. 111. 112. 113. 114. 115. 116. 117. 118. 119. 120. 121. 122. 123. 124. 125. 126. 127. 128. 129. 130. 131. 132. 133. 134. 135. 136. 137. 138. 139. 140. 141. 142. 143. 144.
7、QProgressBar常用样式样式一:

QProgressBar
{
      background:rgb(54,54,54);
      border:none;   /*无边框*/
      border-radius:5px;
      text-align:center;   /*文本的位置*/
      color: rgb(229, 229, 229);  /*文本颜色*/
}

QProgressBar::chunk
{
      background-color:rgb(58, 154, 255);
      border-radius:4px;
}
1. 2. 3. 4. 5. 6. 7. 8. 9. 10. 11. 12. 13. 14.
样式二:
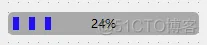
QProgressBar
{
	border-radius:5px;
	background-color:darkgray;
	text-align:center
}
QProgressBar::chunk
{
	background-color:#1F0FEF;
	width:6px;
	margin:5px;
}
1. 2. 3. 4. 5. 6. 7. 8. 9. 10. 11. 12.
竖直样式:
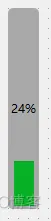
QProgressBar:vertical
{
	border-radius:5px;
	background-color:darkgray;
	text-align:center;
	padding-left:5px;
	padding-right:4px;
	padding-bottom:2px;
}
QProgressBar::chunk:vertical
{
	background-color:#06B025;
	margin:1px;
}
1. 2. 3. 4. 5. 6. 7. 8. 9. 10. 11. 12. 13. 14.
竖直样式:

QProgressBar:vertical
{
	border-radius:5px;
	background-color:darkgray;
	text-align:center;
	padding-left:5px;
	padding-right:4px;
	padding-bottom:2px;
}
QProgressBar::chunk:vertical
{
	background-color:QLinearGradient( x1:0, y1:0, x2:0, y2: 1,stop: 0 #00ff58,stop: 1 #034f1f);
	margin:1px;
}
1. 2. 3. 4. 5. 6. 7. 8. 9. 10. 11. 12. 13. 14.
8、QMenu菜单样式QMenu::item
{
font:16px;
background-color:rgb(253,253,253);
padding:8px 32px;
margin:0px 8px;
border-bottom:1px solid #DBDBDB;
}
/*选择项设置*/
QMenu::item:selected
{
background-color:#FFF8DC;
}
1. 2. 3. 4. 5. 6. 7. 8. 9. 10. 11. 12. 13.
9、qss选择器(1)通配符选择器 /*匹配所有的控件,用星号表示*/
* {
background-color:yellow;
}
/*指明子类,所有QPushButton的样式都会改变*/
* QPushButton {
background-color:yellow;
}
(2)类型选择器 /*通过控件类型来匹配控件的(包括子类)*/
QWidget {
background-color:yellow;
}
/*如果想防止子类,例如窗口被修改,可以设置属性*/
setAttribute(Qt::WA_StyleBackground);
/*类选择器也是通过控件类型来匹配控件,但不同的是不包含子类,语法是在类前面加了个.(是个点)*/
.QWidget {
background-color:yellow;
}
(3)ID选择器
ID选择器是结合控件的objectname来匹配控件的,qss里objectname前加个井号来表示,不同控件的objectname是可以相同的 #blue {
background-color:blue
}
(4)属性选择器(比较复杂不推荐用)
属性选择器是结合控件的属性值来匹配控件的,首先要设定控件的属性,qss里属性用[proterty=attitude]来限制 # python代码
1abel1.setProperty('notice_level','error')
1abe12.setProperty('notice_level','warning')
/*qss代码*/
.QLabel {
	background-color:pink;
}
QLabel[notice_level='warning']{
	border:5px solid ye1low;
}
QLabel[notice_level='error']{
	border:5px solid red;
}
这里还有个用法,就是qss内只定义属性值,只要有这个属性的控件就可以被选中 QLabel [notice_leve1]{
background-color:pink;
}
10、使用qss文件动态加载qss(1)准备style.qss QWidget{
background-color: rgb(255, 234, 12);
}
QPushButton {
color: white;
background-color: blue;
border-radius: 10px;
}
(2)读取文件,并统一加载 from PySide6.QtWidgets import QMessageBox
import MainWindow
class MainWindowImpl(MainWindow.Ui_MainWindow):
def __init__(self, window):
super().__init__()
self.setupUi(window)
self.window = window
self.loadQss()
def loadQss(self):
# 读取qss文件,并加载,不能通过Resource资源文件加载,只能读。
# 如果打包的话,需要将这个qss文件打包进去,获取到本地路径,然后加载
try:
qssFile = 'style.qss'
with open(qssFile, 'r') as f:
qss = f.read()
# 加载所有qss
self.window.setStyleSheet(qss)
except FileNotFoundError:
QMessageBox.information(None, '提示', 'qss file NotFoundError')
1. 2. 3. 4. 5. 6. 7. 8. 9. 10. 11. 12. 13. 14. 15. 16. 17. 18. 19. 20. 21. 22. 23. 24.
11、QDarkStyle夜间模式官网:https://pypi.org/project/QDarkStyle/ (1)安装 # 安装
pip install QDarkStyle
(2)使用 import sys
from PySide6.QtWidgets import QApplication, QWidget
from MainWidgetImpl import MainWidgetImpl
import qdarkstyle
if __name__ == '__main__':
app = QApplication(sys.argv)
w = QWidget()
wImpl = MainWidgetImpl(w)
w.show()
# PySide 6 给QWidget统一设置StyleSheet即可
dark_stylesheet = qdarkstyle.load_stylesheet_pyside6()
w.setStyleSheet(dark_stylesheet)
sys.exit(app.exec())
1. 2. 3. 4. 5. 6. 7. 8. 9. 10. 11. 12. 13. 14. 15. 16. 17. 18. 19. 20. 21.
12、禁止子窗口使用主窗口的样式self.setAttribute(Qt.WA_StyledBackground) # 禁止父窗口样式影响子控件样式
# 鼠标追踪,如果某些样式没生效,可以设置这个试试
self.setMouseTracking(True)
七、图表与曲线1、pyqtgraph(1)安装 # 安装
pip install pyqtgraph
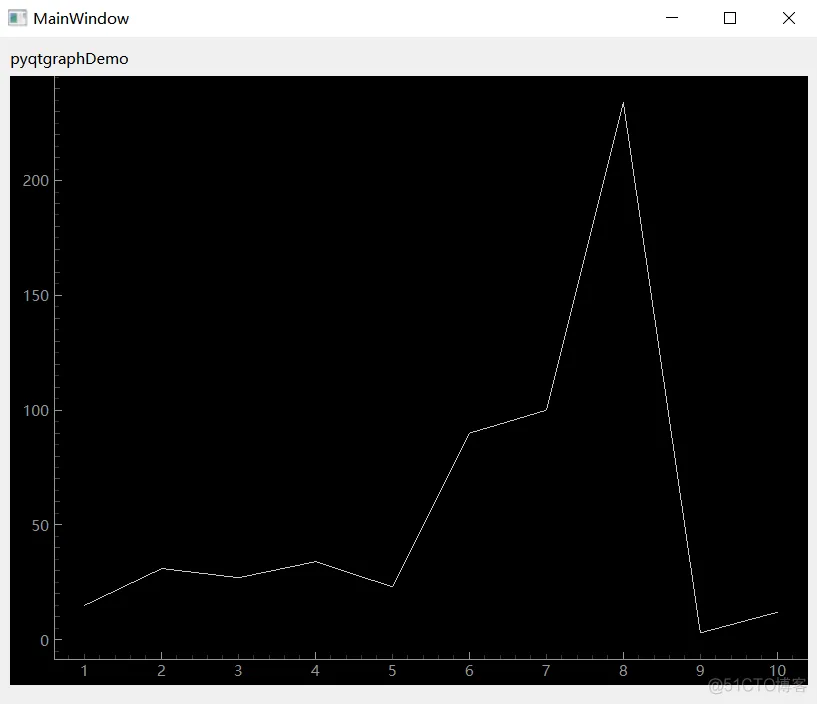
(2)在qt designer中使用pyqtgraph


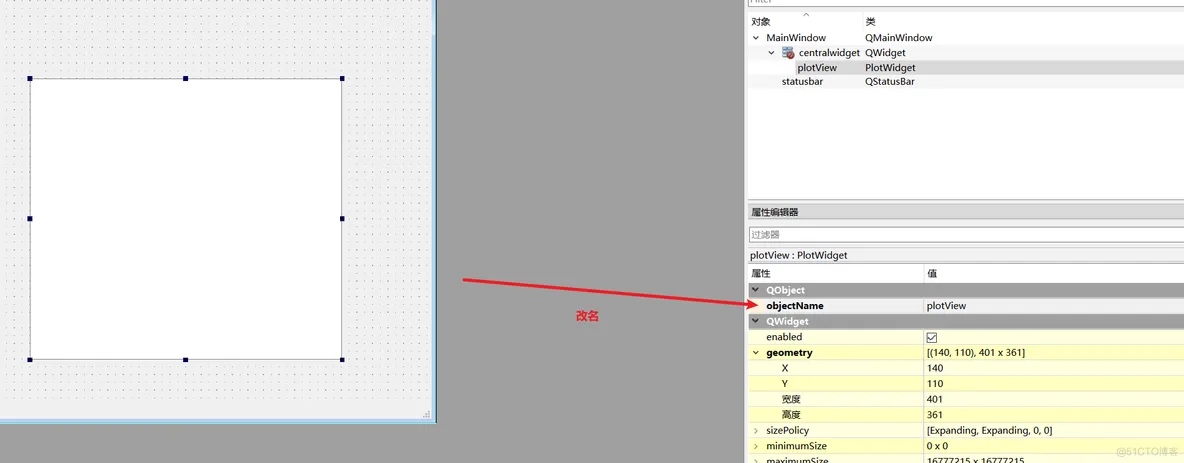
import MainWindow
class MainWindowImpl(MainWindow.Ui_MainWindow):
    def __init__(self, window):
        super().__init__()
        self.setupUi(window)
        self.window = window
        # x轴
        hour = [1, 2, 3, 4, 5, 6, 7, 8, 9, 10]
        # y轴
        tempture = [15, 31, 27, 34, 23, 90, 100, 234, 3, 12]
        self.plotView.plot(hour, tempture)
1. 2. 3. 4. 5. 6. 7. 8. 9. 10. 11. 12. 13. 14. 15. 16.
八、使用SQLite数据库1、简介及准备工作sqlite是用C语言编写的一个嵌入型开源数据库,可以直接集成到项目代码中,SQLite 数据库不需要server,它只是一个文件,存储在磁盘中。像其他数据库一样,SQLite 支持事务,这意味着你可以组合多个操作作为一个单一的、原子的操作。
入门:https://www.runoob.com/sqlite/sqlite-tutorial.html
默认python自带sqlite库,直接用即可 2、基本语法入门参考:https://www.runoob.com/sqlite/sqlite-python.html '''
python操作sqlite3
'''
import sqlite3
if __name__ == '__main__':
conn = sqlite3.connect('D:/example.db')
c = conn.cursor()
sql1 = '''
CREATE TABLE IF NOT EXISTS tb01
(date text, book_name, express text, price real)
'''
c.execute(sql1)
sql2 = '''
INSERT INTO tb01 VALUES('2024-1-20', 'book01', 'beijing', '13.45');
INSERT INTO tb01 VALUES('2024-1-3', 'book03', 'beijing', '13.45');
INSERT INTO tb01 VALUES('2024-1-2', 'book02', 'beijing', '13.45');
INSERT INTO tb01 VALUES('2024-1-4', 'book04', 'beijing', '13.45');
'''
datas = [
('2024-1-20', 'book01', 'beijing', '13.45'),
('2024-1-3', 'book03', 'beijing', '13.45'),
('2024-1-2', 'book02', 'beijing', '13.45'),
('2024-1-4', 'book04', 'beijing', '13.45')
]
# 插入多行数据
c.executemany('INSERT INTO tb01 VALUES (?,?,?,?)', datas)
sql3 = '''
select * from tb01
'''
c.execute(sql3)
sql4 = '''
select * from tb01 where book_name='book01'
'''
# 更新数据
sql5 = '''
update tb01 set book_name='book20' where date='2024-1-20'
'''
#c.execute(sql5)
# 打印查询后的数据
for row in c.fetchall():
print(row)
conn.commit()
conn.close()
1. 2. 3. 4. 5. 6. 7. 8. 9. 10. 11. 12. 13. 14. 15. 16. 17. 18. 19. 20. 21. 22. 23. 24. 25. 26. 27. 28. 29. 30. 31. 32. 33. 34. 35. 36. 37. 38. 39. 40. 41. 42. 43. 44. 45. 46. 47. 48. 49. 50. 51. 52. 53. 54. 55. 56. 57. 58. 59.
3、PySide6使用SQLite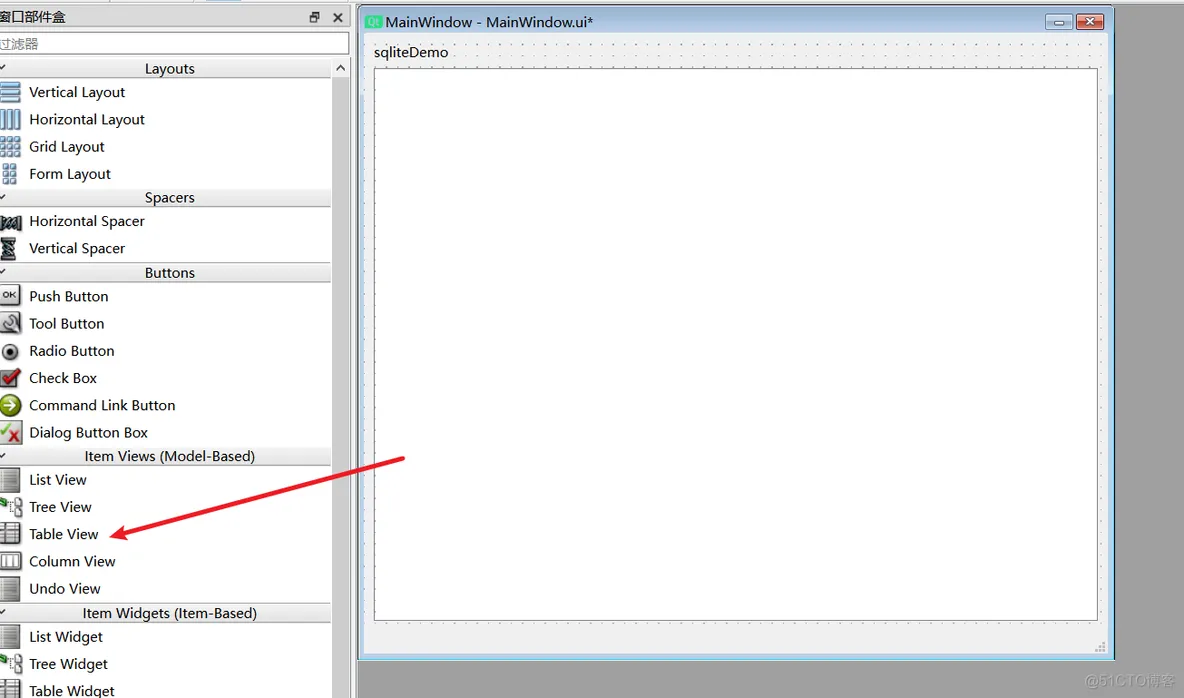
from PySide6.QtSql import QSqlDatabase, QSqlTableModel
from PySide6.QtWidgets import QMessageBox
import MainWindow
class MainWindowImpl(MainWindow.Ui_MainWindow):
    def __init__(self, window):
        super().__init__()
        self.setupUi(window)
        self.window = window
        db = QSqlDatabase.addDatabase("QSQLITE")
        db.setDatabaseName('D:/example.db')
        if not db.open():
            QMessageBox.information(None, '提示', 'sqlite连接失败')
            return
        model = QSqlTableModel()
        model.setTable('tb01')
        # 设置策略,当Qt数据视图修改时,sqlite同步更新
        model.setEditStrategy(QSqlTableModel.OnFieldChange)
        model.select()  # 必须调用,不然不显示数据
        self.tableView.setModel(model)
1. 2. 3. 4. 5. 6. 7. 8. 9. 10. 11. 12. 13. 14. 15. 16. 17. 18. 19. 20. 21. 22. 23. 24. 25. 26. 27. 28.

九、项目打包1、常用打包技术NSIS
Inno Setup(本次使用)
Qt Installer Framework,不常用
SetupFactory
advanced installer,收费 2、PySide6项目打包(1)使用pyinstaller打包python# (1)安装pyinstaller
pip install pyinstaller
# (2)执行打包,进入到main文件的目录
pyinstaller -w main.py
# 参数说明
#-w :--windowed --noconsole,不显示命令行窗口,仅对windows有效
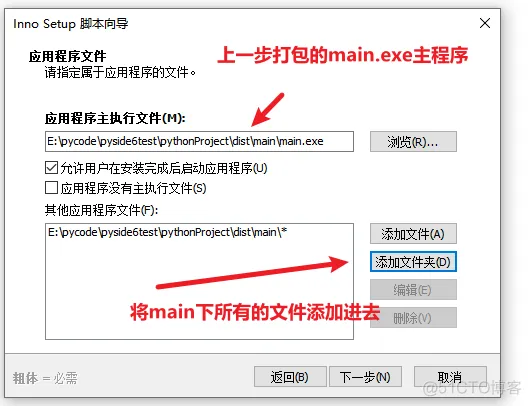
打包后的dist目录,就是应用程序,执行main.exe就可以执行程序了 (2)使用Inno Setup1、下载,百度搜一搜就行
https://inno-setup.updatestar.com/https://www.downkuai.com/soft/113997.html 下载安装,点下一步就行。
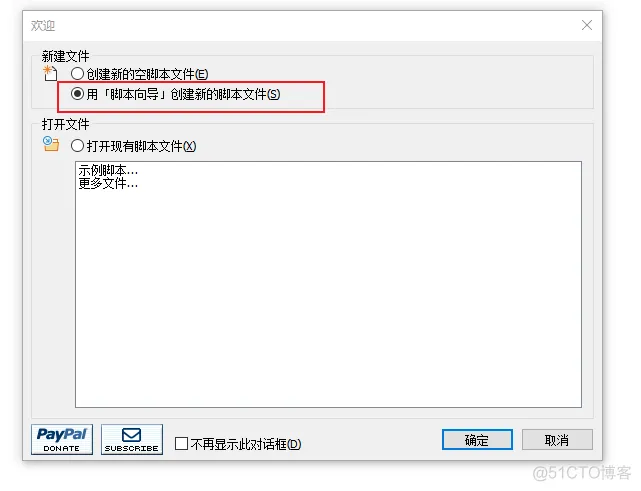
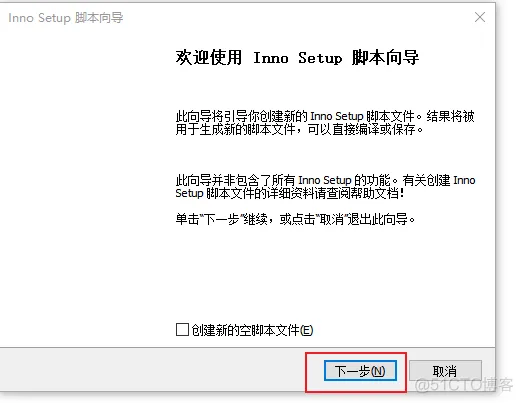
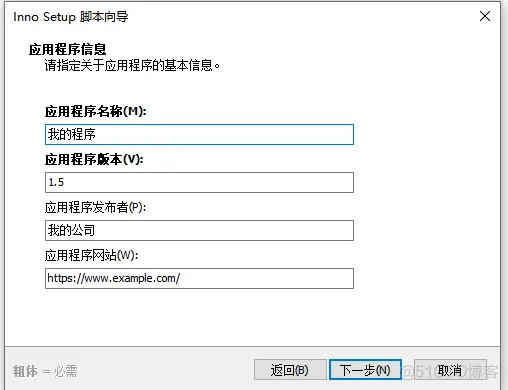
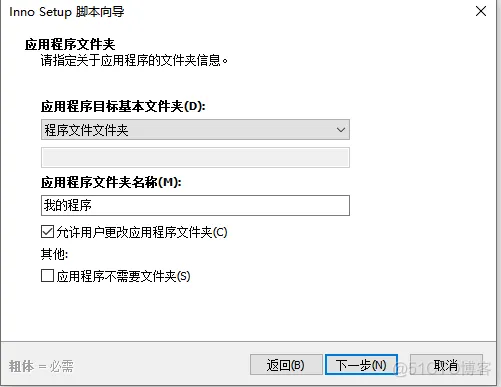
2、打开软件

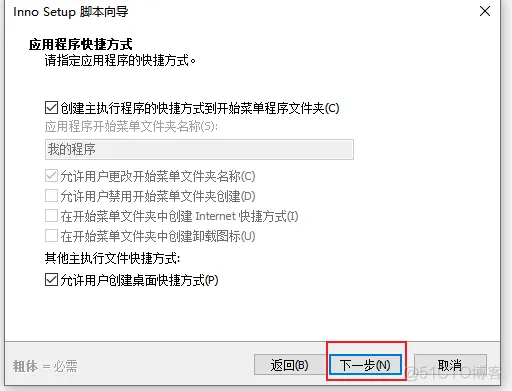
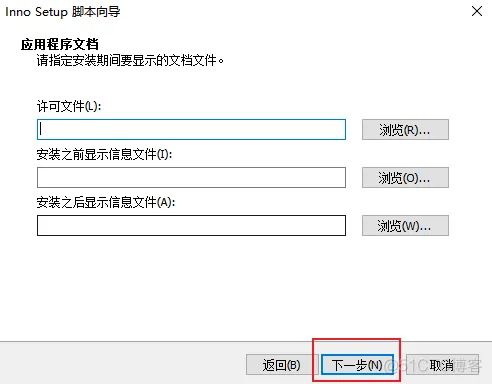
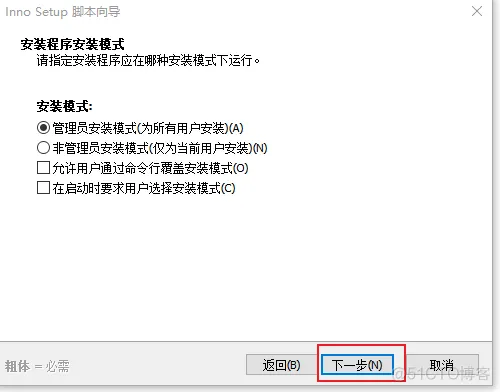
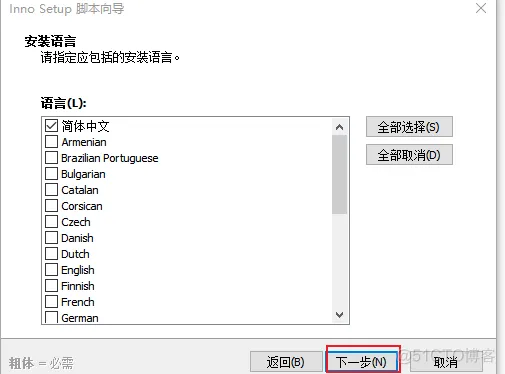
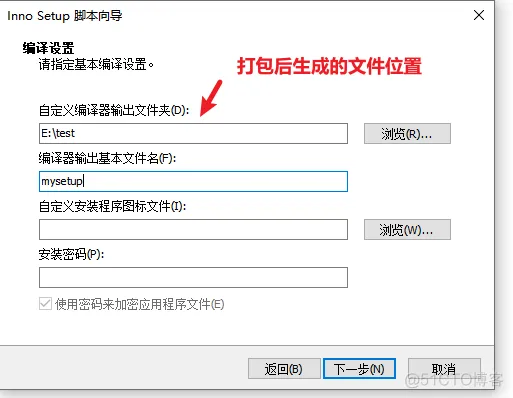
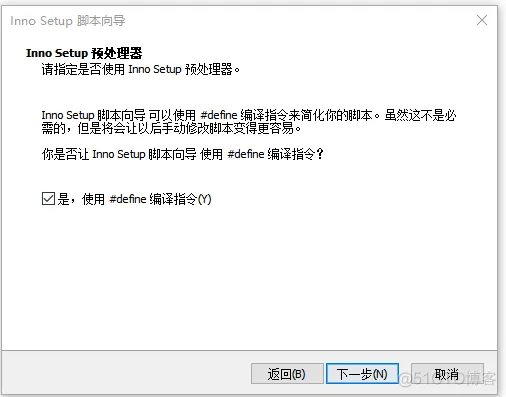
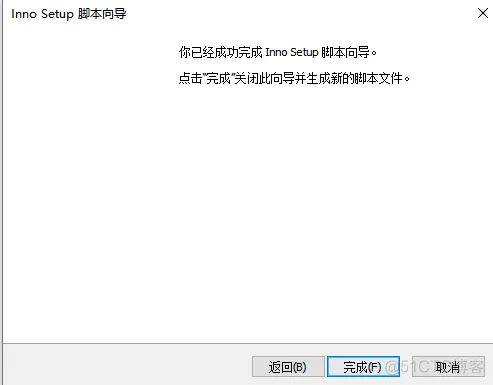
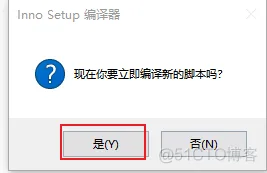


然后自动开始打包,打包完成后:
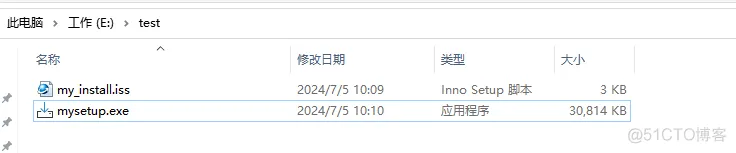
双击mysetup.exe就可以安装,安装的软件可以正常进行安装、卸载。
生成的脚本文件,可以进行修改和继续使用。
(3)图标注意事项除了在打包前定义的图标之前,还需要修改脚本:
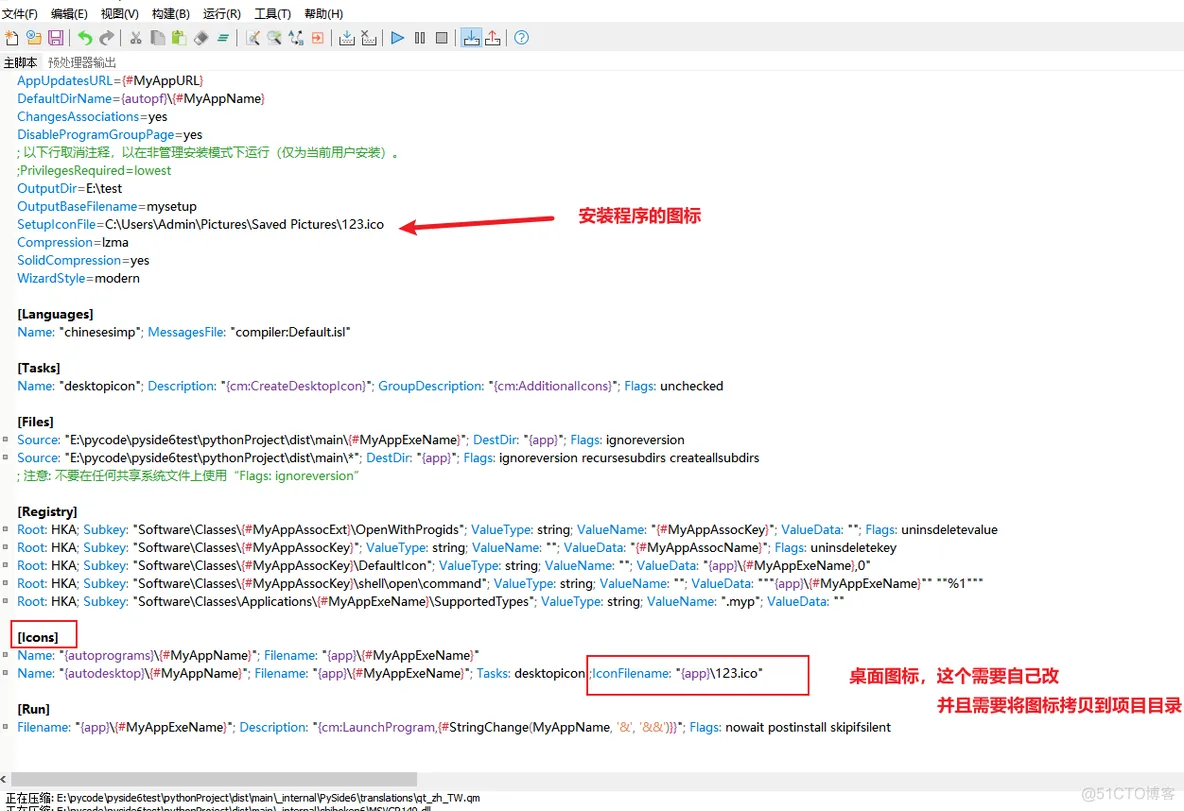
然后点构建-编译,重新打包。 附图标在线转换:https://www.hipdf.cn/jpg-to-ico
QMessageInfo还没学。
该文章在 2025/2/14 12:11:40 编辑过
|
|


 400 186 1886

